
Introduction
As the weather starts to get colder, many of us are eager to start growing our own winter vegetables. One of the most effective ways to do this is by setting up a winter garden tunnel. In this article, we’ll explore what you need to know about building and using a winter garden tunnel to grow fresh produce all year round.
What is a Winter Garden Tunnel?
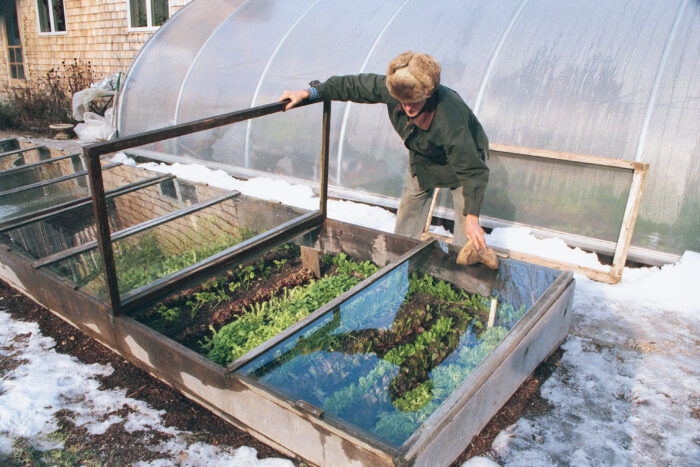
A winter garden tunnel is a structure that provides protection for your plants from harsh weather conditions, such as wind, cold temperatures, and frost. It’s essentially a mini-greenhouse that you can set up in your backyard or even indoors. By using a winter garden tunnel, you can extend the growing season of your favorite vegetables and enjoy fresh produce even during the coldest months.
Why Do You Need a Winter Garden Tunnel?
If you’re serious about growing winter vegetables, you’ll need a winter garden tunnel. Here are just a few reasons why:
- Protection from wind: Wind can be devastating for young seedlings, causing them to dry out and even die. A winter garden tunnel protects your plants from strong winds and allows them to grow stronger.
- Temperature regulation: Winter garden tunnels help regulate the temperature inside the tunnel, keeping it warm in the winter and cool in the summer. This means that you can grow a wider variety of vegetables year-round.
- Frost protection: Even if it snows outside, your plants will be protected from frost damage by the winter garden tunnel.
How to Build a Winter Garden Tunnel
Building a winter garden tunnel is easier than you think! Here are the basic materials and steps:
- Choose the right frame: You’ll need arch-shaped supports made of aluminum or recycled materials. The length should be determined according to whether you want to cover more beds or just one.
- Select the covering material: You can use polietylene tarpaulins that are specifically designed for greenhouse use. These tarpaulins are usually 0.15 mm thick and come in rolls that you can cut to size.
- Attach the tarpaulin: Use simple clips to attach the tarpaulin to the arches. Make sure the ends of the arches are deeply anchored in the ground so that the winter garden tunnel is solid.
- Add ventilation: On the sides, add systems for rolling up the tarpaulin (even simply with twine and rubber bands) so that your plants can be ventilated on sunny days at the end of winter.
Winter Garden Tunnels vs. Greenhouses
Many people confuse winter garden tunnels with greenhouses. While both provide protection for plants, there are some key differences:
- Size: Winter garden tunnels are generally smaller than greenhouses and are designed to cover a single row or bed of vegetables.
- Material: The frames of winter garden tunnels are usually made of aluminum or recycled materials, while greenhouses often use steel or PVC pipes.
- Ventilation: Greenhouses have more complex ventilation systems that allow for better airflow and temperature regulation. Winter garden tunnels typically rely on simple clips to attach the tarpaulin.
Where to Buy a Winter Garden Tunnel
You can find winter garden tunnels online or in gardening stores. Here are some popular options:
- Mini tunnel kits: These kits usually include everything you need to build a small winter garden tunnel, including the frame, tarpaulin, and clips.
- Complete kits: These kits come with all the necessary materials, including the frame, tarpaulin, clips, and ventilation system.
Types of Winter Garden Tunnels
There are several types of winter garden tunnels that you can use, depending on your needs and preferences. Here are some popular options:
- Simple tunnel: A simple tunnel is a basic structure made from aluminum or recycled materials. It’s perfect for small gardens and can be built using a DIY kit.
- Large tunnel: A large tunnel is ideal for bigger gardens and can cover multiple beds of vegetables. It’s also a good option if you want to grow a variety of crops year-round.
- Pop-up tunnel: A pop-up tunnel is a lightweight structure that can be set up quickly and easily. It’s perfect for small gardens and can be used as a temporary solution until you build a more permanent winter garden tunnel.
Designing Your Winter Garden Tunnel
When designing your winter garden tunnel, there are several things to consider:
- Location: Choose a location that gets plenty of sunlight during the day. This will help warm up the tunnel and keep it cozy for your plants.
- Size: Determine how big you need your tunnel to be based on the amount of space you have available and the number of beds you want to cover.
- Material: Choose a frame material that is durable and can withstand the elements. Aluminum or recycled materials are good options.
- Covering material: Select a covering material that is waterproof and easy to clean. Polietylene tarpaulins are popular choices for winter garden tunnels.
Tips for Using Your Winter Garden Tunnel
Here are some tips for using your winter garden tunnel effectively:
- Plant selection: Choose plants that are suitable for cold weather and can thrive in a protected environment.
- Soil preparation: Prepare the soil inside the tunnel by adding organic matter and fertilizers. This will help promote healthy plant growth.
- Lighting: Provide supplemental lighting if necessary, as some plants may require more light than is available naturally.
- Pruning: Prune your plants regularly to maintain their shape and encourage healthy growth.
Common Mistakes to Avoid
When building a winter garden tunnel, there are several common mistakes to avoid:
- Insufficient anchoring: Make sure the ends of the arches are deeply anchored in the ground to prevent them from shifting or collapsing.
- Poor ventilation: Ensure that your tunnel has adequate ventilation to prevent overheating and moisture buildup.
- Inadequate covering material: Choose a covering material that is waterproof and easy to clean, as it will help protect your plants from the elements.
Conclusion
Growing winter vegetables can be challenging, but setting up a winter garden tunnel is easier than you think! With the right materials and a little bit of know-how, you can extend the growing season of your favorite vegetables and enjoy fresh produce all year round. By following these tips and avoiding common mistakes, you’ll be well on your way to becoming a successful winter gardener.


