
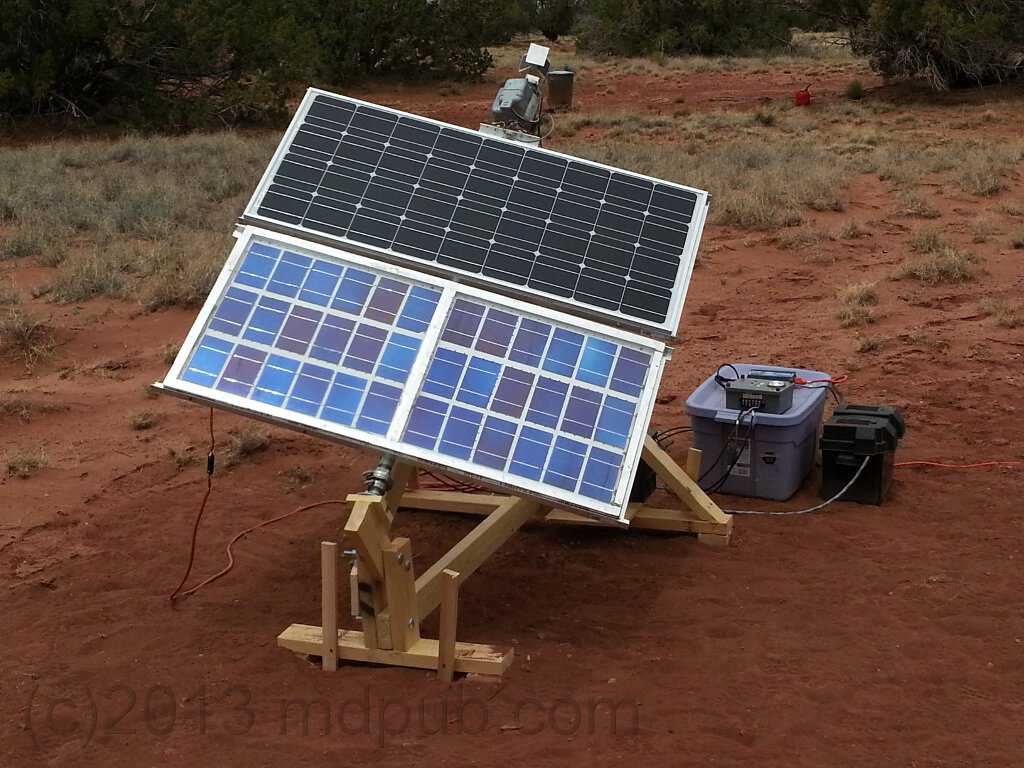
Building a Solar Tracker: A Step-by-Step Guide to Creating Your Own Bi-Axis Solar Tracker
A solar tracker is not an easy task, but building one can be a rewarding experience. This device serves to regulate the optimal position of solar panels, allowing sunlight to hit them perpendicularly and maximizing energy production. There are two types of solar trackers: mono-axial and bi-axial. A mon-axial tracker is simpler and more affordable to build but produces only 25% more energy than a standard solar panel. On the other hand, a bi-axial tracker can produce up to 40% more energy if built correctly.
Understanding Solar Trackers
If you’re looking for a low-budget project, you can start with a simple structure made from recycled metal profiles, connected by barbed wires and supported by brackets or dummies. The movement of the two axes (enabling baccheggio and rollio movements) is possible thanks to two linear actuators, commonly used in telecommunications to tilt parabolic dishes and antennas. These actuators are controlled by a simple software called Raspberry Pi, which allows remote management of your solar tracker.
How Bi-axial Solar Trackers Work
Each axis uses three IO ports: two output ports that activate the actuator, determining the direction of movement (inverting the polarity of the power supply can extend or retract the axis), and one input port that counts the pulses generated by the translator at every rotation of the actuator.
Construction Considerations
The solar tracker should be assembled from south to north, but if you want to mount it in a different direction, you can use commands provided by the software to adjust the orientation. The software uses a server to manage commands for the motors (which allow movement of the solar tracker at two axes). The server handles various commands such as “goto angle”, “goto position”, “goto azimuth and elevation”, lock, unlock, and calibrate.
Software Considerations
The Raspberry Pi software provides a simple and efficient way to control the actuators. It can be connected to your home network, allowing you to manage your solar tracker remotely.
Materials Needed for Construction
Building a bi-axial solar tracker requires a wide range of materials, including:
- Steel tubing for support
- A casing with a central unit and connectors linked to the software
- Actuators (linear motors)
- Terminal blocks
- Condensers
- Wire…
When considering materials needed, keep in mind that this is not an exhaustive list, and your project may require additional components.
Alternative Options
While Raspberry Pi is a popular choice for solar tracker projects, many enthusiasts prefer using Arduino. Arduino allows precise control of the panel’s movements through a feedback mechanism that enables software to orient the entire structure with high accuracy.
Downloadable Project Plans
To make building a bi-axial solar tracker even easier, we have created a detailed PDF project plan created by two young students from Lugano’s Liceo Cantonale.
FAQs
- What is a solar tracker, and why do I need one?
- How does a bi-axial solar tracker work, and what are its benefits?
- What materials am I required to construct a bi-axial solar tracker?
- Can I use Arduino instead of Raspberry Pi for my solar tracker project?
- Why is it important to consider the orientation of the solar tracker?
- How can I control the actuators and software remotely?
- What are some potential drawbacks or challenges associated with building a bi-axial solar tracker?
- Are there any specific safety precautions that need to be taken when constructing and using a solar tracker?
Step-by-Step Guide to Building a Bi-Axial Solar Tracker
Here’s a step-by-step guide on how to build your own bi-axial solar tracker, following the construction considerations mentioned earlier.
Step 1: Plan Your Project
Before you start building, it is essential to plan your project. Here are some things to consider:
- How much energy do you want to generate?
- What type of solar panels will you use?
- Where will you place the tracker (e.g., south-facing roof or ground mount)?
- Are there any specific regulations or guidelines for solar trackers in your area?
Step 2: Choose Your Actuators
The actuators are the heart of a bi-axial solar tracker. You can choose from various options, including:
- Linear motors
- Servo motors
- Stepper motors
Consider factors such as power consumption, accuracy, and cost when selecting your actuators.
Step 3: Design Your Tracker’s Movement System
The movement system is responsible for moving the solar panels to track the sun. You can choose from various options, including:
- Back-and-forth (baccheggio) motion
- Rollio motion
- Both baccheggio and rollio motions
Consider factors such as complexity, cost, and accuracy when designing your tracker’s movement system.
Step 4: Assemble the Tracker’s Casing
The casing houses the actuators, electronics, and other components. You can choose from various materials, including:
- Aluminum
- Steel
- Plastic
Consider factors such as durability, weight, and cost when selecting your casing material.
Step 5: Install the Actuators and Electronics
Install the actuators and electronics according to the manufacturer’s instructions. Make sure they are securely attached to the casing.
Step 6: Connect the Power Supply and Control System
Connect the power supply to the actuators and control system (Raspberry Pi or Arduino). Make sure everything is properly connected and configured.
Step 7: Calibrate the Tracker
Calibrate the tracker by adjusting the movement system and actuator speeds. This ensures accurate tracking and optimal energy production.
Step 8: Test the Tracker
Test the tracker to ensure it’s working correctly. Monitor its performance, making any necessary adjustments to optimize energy production.
Common Challenges and Solutions
Here are some common challenges you may face when building a bi-axial solar tracker, along with solutions:
- Incorrect tracking: Make sure the movement system is properly calibrated and adjusted.
- Low energy production: Adjust the tracker’s orientation or actuator speeds to optimize energy production.
- Malfunctioning actuators: Check for proper connection and configuration of the actuators. Replace them if necessary.
Safety Precautions
When constructing and using a solar tracker, consider the following safety precautions:
- Electrical shock: Ensure proper insulation and grounding of electrical components.
- Physical hazards: Use protective gear when working with power tools or climbing ladders.
- Weather conditions: Secure the tracker to prevent damage from strong winds or extreme temperatures.
Conclusion
Building a bi-axial solar tracker requires careful planning, precise construction, and attention to detail. By following this step-by-step guide and considering common challenges and safety precautions, you can create an efficient and reliable solar tracker that maximizes energy production.


