
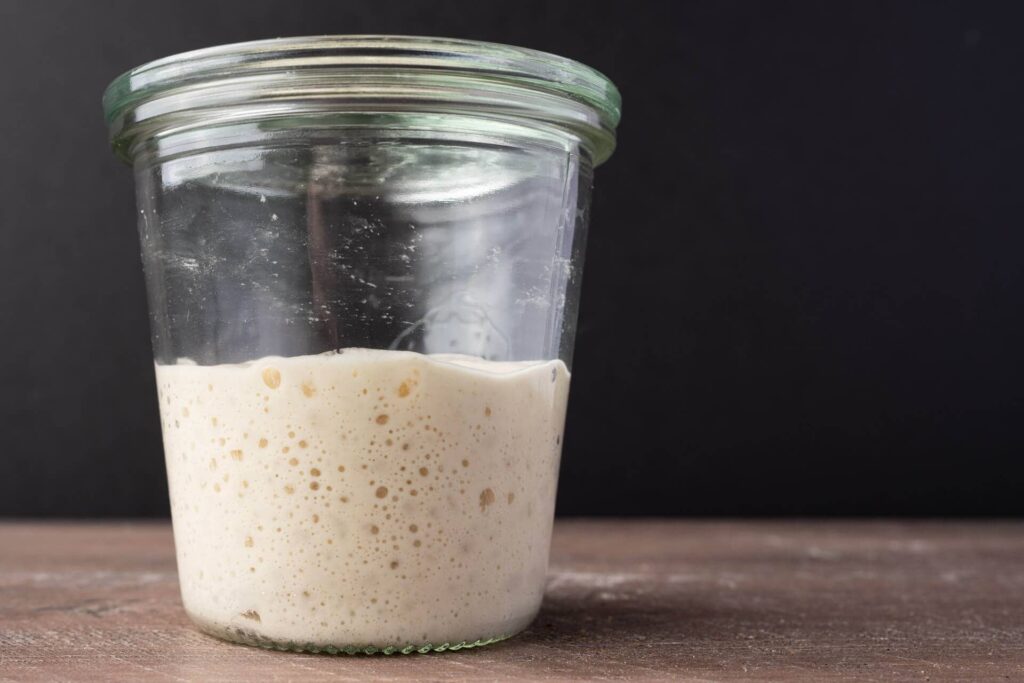
As a baker, it’s essential to understand the importance of refreshing your natural yeast starter, also known as “paste madre” in Italian. This process allows the microorganisms that drive the fermentation process to thrive, enabling you to create a wide variety of delicious baked goods, from crusty breads and pizzas to sweet treats like cakes and pastries.
In this article, we’ll delve into the world of yeast starters, exploring what it takes to revive your natural yeast, how often to refresh it, and some tasty recipes to try.
Understanding Your Yeast Starter
Before we dive into the nitty-gritty, let’s take a closer look at what your yeast starter is all about. A healthy yeast starter is teeming with microorganisms that feed on sugars and produce carbon dioxide gas as a byproduct. This process is responsible for the dough’s rise, giving your baked goods their characteristic texture and flavor.
A typical yeast starter consists of three main components:
- Flour: The foundation of your yeast starter is made up of flour, which provides carbohydrates for the microorganisms to feed on.
- Water: Water plays a crucial role in maintaining the health and vitality of your yeast starter. It helps to hydrate the microorganisms and facilitate fermentation.
- Yeast: Yeast is responsible for fermenting sugars and producing carbon dioxide gas, causing the dough to rise.
The Refreshment Process
So, how do you revive your natural yeast starter? The process is surprisingly simple:
- Observation: Take a gander at your yeast starter in the fridge. If it looks particularly tough, remove it and discard it (we’ll get to that later).
- Measurement: Weigh out an equal amount of flour and water (by weight) for your starter.
- Mixing: Combine the flour and water, then mix until a smooth dough forms.
Tips for Refreshing Your Yeast Starter
Here are some additional tips to keep in mind:
- Use filtered or bottled water, as chlorine in tap water can harm the yeast.
- Store your yeast starter in an airtight container in the fridge to slow down fermentation.
- Feed your starter regularly to maintain its health and vigor.
The Refreshment Process: Step-by-Step
Now that we’ve covered the basics, let’s walk through the refreshment process:
- Weight Measurement: Weigh out 100 grams of flour and 50 milliliters (mL) of water.
- Mixing: Combine the flour and water, then mix until a smooth dough forms.
- Kneading: Knead the dough for about 10 minutes, until it becomes smooth and elastic.
Reviving Your Yeast Starter: A Personal Perspective
As someone who bakes regularly, I’ve learned that refreshing my yeast starter is an essential part of maintaining its health and vigor. Here’s how I approach it:
- I feed my starter every week, usually when I’m preparing a new batch of bread or pizza dough.
- I use a combination of all-purpose flour and whole wheat flour to keep things interesting.
The Benefits of Refreshing Your Yeast Starter
So why is refreshing your yeast starter so important? Here are just a few benefits:
- Increased flavor: A healthy yeast starter produces more CO2, resulting in a more complex and nuanced flavor profile.
- Better texture: Fresh yeast starters produce dough with better structure and elasticity.
Conserving Your Yeast Starter
While it’s essential to refresh your yeast starter regularly, there are some tips for conserving it:
- Store it properly: Keep your yeast starter in an airtight container in the fridge to slow down fermentation.
- Feed it sparingly: Only feed your starter when you’re ready to use it.
When to Refresh Your Yeast Starter
The frequency of refreshing your yeast starter depends on various factors, including:
- The size of your starter: Smaller starters require more frequent refreshment (every 3-5 days).
- The type of flour used: Different types of flour have varying levels of nutrient content, affecting the starter’s health.
A Beginner’s Guide to Yeast Starters
For those new to yeast baking, here are some essential tips:
- Start small: Begin with a small starter (about 100 grams) and gradually increase its size as you gain experience.
- Be patient: Yeast starters require time to develop and mature.
Tips for Baking with a Refreshed Yeast Starter
When working with a refreshed yeast starter, keep the following tips in mind:
- Use it within a day or two: Fresh yeast starters are more sensitive to temperature fluctuations, so use them within 24 hours.
- Store it properly: Keep your starter refrigerated after each use.
Common Issues and Solutions
Here are some common issues that may arise when working with yeast starters:
- Mold growth: If you notice mold growing on your starter, discard it immediately and start fresh with a new batch.
- Slow fermentation: If your starter is fermenting slowly, try adding more flour or water to stimulate activity.
Conclusion
Reviving your natural yeast starter is an essential part of baking with confidence. By following these simple steps and tips, you’ll be well on your way to creating delicious breads, pizzas, and pastries that are sure to impress.
Frequently Asked Questions (FAQs)
Q: How often should I refresh my yeast starter?
A: The frequency of refreshing your yeast starter depends on factors like the size of your starter, type of flour used, and storage conditions. As a general rule, aim to refresh it every 3-5 days.
Q: Can I use tap water for my yeast starter?
A: It’s recommended to use filtered or bottled water, as chlorine in tap water can harm the yeast.
Q: How do I store my yeast starter after refreshing?
A: Store your refreshed starter in an airtight container in the fridge to slow down fermentation.
Q: Can I use a yeast starter that’s been refrigerated for months?
A: If your starter has been refrigerated for too long, it may need some extra TLC before being revived. Start with a small amount of flour and water and gradually increase the size as needed.
Q: How do I know if my yeast starter is healthy and active?
A: A healthy yeast starter should be bubbly, frothy, and have a tangy aroma.
Q: Can I use a yeast starter to make bread without refrigeration?
A: While it’s technically possible to use a yeast starter for bread making without refrigeration, the results may vary depending on factors like temperature and storage conditions. For best results, consider using a fridge or cold storage container.
Q: How do I get rid of mold in my yeast starter?
A: If you notice mold growing on your starter, discard it immediately and start fresh with a new batch.
Q: Can I share my yeast starter with friends or family members?
A: While it’s technically possible to share your yeast starter, be sure to follow proper sanitation procedures to avoid contamination.


