
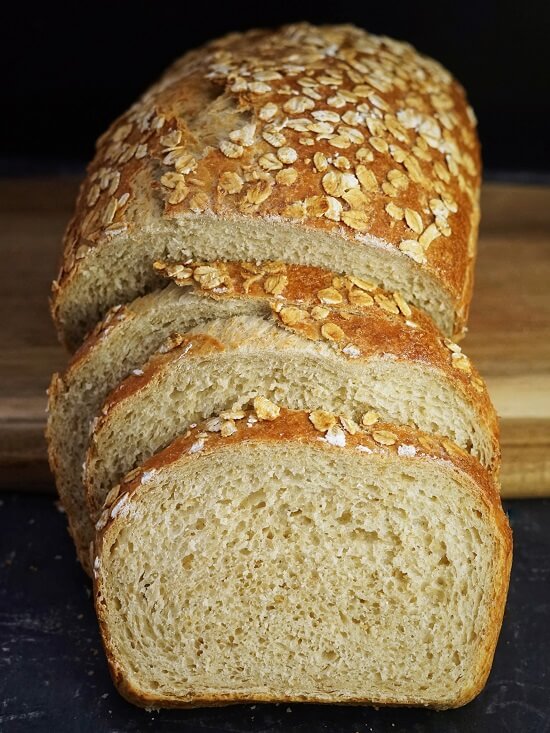
As a lover of baking and health-conscious foodies, it’s time to explore the world of low-glycemic flours and discover the magic of oatmeal bread. In this article, we’ll delve into the process of making oat flour from scratch, exploring its benefits and limitations, and share a simple recipe for an delicious and soft oatmeal bread.
Understanding Oat Flour: The Key to Low-Glycemic Baking
Oat flour, also known as “oat flakes” or “oat cream,” is obtained from cooked and rolled oats. This type of flour has gained popularity in recent years due to its low glycemic index, making it an excellent choice for those with dietary restrictions.
Where to Find Oat Flour: A Convenient Option
You can find oat flour at most supermarkets with baking supplies or online on Amazon. However, be cautious when shopping, as “instant oats” or “oat cream” might not be the same thing as high-quality oat flour used specifically for bread-making.
How to Make Oat Flour at Home: A Simple Process
Making oat flour from scratch is easier than you think! Simply grind rolled oats using a blender or grinder. Whole-grain oat flakes can also be used, providing a higher-fiber content in your bread. You can purchase whole-grain oat flakes online or in well-stocked supermarkets.
Benefits of Using Oat Flour
Using oat flour offers numerous benefits for health-conscious consumers and bakers alike:
- Lower Glycemic Index: Oat flour contains beta-glucans, a type of soluble fiber that slows down the digestion of carbohydrates, reducing blood sugar spikes.
- Higher Fiber Content: Whole-grain oats used to make oat flour provide more fiber, making this bread option an excellent choice for those seeking a higher-fiber diet.
- Gluten-Free Options: Oat flour can be used to create gluten-free bread, providing a suitable alternative for those with celiac disease or gluten intolerance.
Limitations of Using Oat Flour
While oat flour is a great choice, there are some limitations to consider:
- Texture: Oatmeal bread often has a denser texture due to the high fiber content in oats. This can be both beneficial and challenging for bakers.
- Flavor: Some people may find that oat flour gives their bread a slightly nutty or bland flavor.
A Recipe for Oatmeal Bread: Soft and Flavorful
Now that we have our oat flour, let’s move on to the recipe! Our 800g bread loaf requires:
- 400g of oat flour
- 650ml of warm water
- 1 tablespoon of instant dry yeast (8-10g)
- 2 teaspoons of baking powder (about 10g)
- 1 teaspoon of honey (12ml)
- 2 tablespoons of olive oil (30ml)
Dissolve the yeast and baking soda in warm water, then begin mixing all ingredients using a manual whisk. Don’t worry if you notice an impasto – it’s normal! The oatmeal bread has a unique consistency, so don’t be surprised if it doesn’t have the same shape as classic bread.
Shaping Your Oatmeal Bread: A Creative Touch
To give your oatmeal bread shape, use a cake pan or a simple container with high sides. Grease the container well before pouring in the dough.
The Art of Rising: Letting Your Dough Rest
Before cooking, let your oatmeal bread rise for 2 hours or 2 and a half hours. To improve rising, move the dough directly to the baking container and cover it with plastic wrap.
Tips for Improving Oatmeal Bread Rise: Common Issues
If you notice that your oatmeal bread is not rising as expected:
- Insufficient Yeast: Increase yeast content to ensure proper fermentation.
- Incorrect Water Temperature: Ensure water is warm enough (around 90°F) for optimal yeast activity.
- Overmixing Dough: Avoid overmixing the dough, which can lead to dense bread.
Cooking Your Oatmeal Bread: The Final Touches
After the rising time, check the volume of your dough – it should have increased by about 30%. Proceed with cooking in a preheated oven at 220°C. Cooking will take 45 minutes. After 40 minutes, use the toothpick test to check for doneness.
The Ultimate Guide to Making Delicious Oatmeal Bread: A Step-by-Step Journey
With these simple steps and a bit of patience, you’ll be enjoying delicious oatmeal bread in no time! Remember to explore more recipes with oats for an added layer of flavor and nutrition.


