
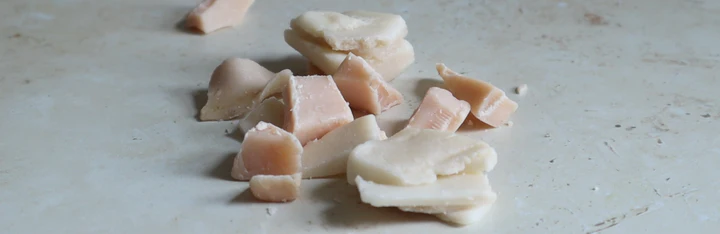
Are you tired of wasting soap by using up every last bit? Do you want to get creative and make personalized soap recipes with unique fragrances? Look no further! In this article, we’ll explore the art of creating soap with advanced flake sapon, a simple yet effective way to reuse and recycle old soap.
What is Advanced Flake Sapon?
Advanced flake sapon refers to the process of reusing and recycling old soap flakes by mixing them with new ingredients. This technique not only reduces waste but also allows you to create unique and personalized soap recipes.
Benefits of Creating Soap with Advanced Flake Sapon
- Reduces waste: By reusing old soap flakes, you’re reducing your environmental footprint and minimizing the amount of waste sent to landfills.
- Saves money: You can reuse existing ingredients instead of purchasing new ones, making it a cost-effective way to create soap.
- Customization: Advanced flake sapon allows you to create unique fragrances and recipes by combining different herbs, spices, and essential oils.
How to Create Soap with Advanced Flake Sapon
Step 1: Collecting Old Soap Flakes
Old soap flakes can be collected from various sources, such as:
- Leftover bar soap
- Soap scraps from soap making
- Soap residue from washing dishes or hands
Place the soap flakes in a bowl and grind them into smaller pieces using a blender or food processor.
Step 2: Creating the Soap Base
Combine the ground soap flakes with distilled water to create a paste. The ratio of soap flakes to water can vary depending on the desired consistency.
- Start with a small amount of water (about 1 cup) and add more as needed.
- Stir well until the mixture forms a smooth, consistent paste.
Step 3: Adding Ingredients and Essential Oils
Once you have your soap base, you can start adding ingredients and essential oils to create unique fragrances and recipes.
- Herbs and spices: Add dried herbs like rosemary, thyme, or lavender to create a soothing and relaxing soap.
- Essential oils: Use essential oils like tea tree oil, peppermint oil, or lemon oil to add a refreshing and invigorating scent.
- Colors: Add natural colors like spirulina, turmeric, or beetroot powder to create unique and vibrant hues.
Step 4: Shaping and Curing the Soap
Once you’ve added your ingredients and essential oils, it’s time to shape and cure the soap.
- Pour the soap base into a mold of your choice.
- Let the soap set for about 2 weeks before removing it from the mold.
- Once removed, cut the soap into bars and let them cure for another week or two.
Recipe 1: Simple Soap Recipe
Ingredients:
- 1 cup ground soap flakes
- 1/4 cup distilled water
- 10 drops tea tree essential oil
Instructions:
- Combine the ground soap flakes with distilled water in a bowl.
- Stir well until the mixture forms a smooth, consistent paste.
- Add the tea tree essential oil and stir well.
- Pour the mixture into a mold of your choice.
- Let it set for about 2 weeks before removing it from the mold.
Recipe 2: Herb-Infused Soap Recipe
Ingredients:
- 1 cup ground soap flakes
- 1/4 cup distilled water
- 10 drops lavender essential oil
- 1 tablespoon dried rosemary leaves
Instructions:
- Combine the ground soap flakes with distilled water in a bowl.
- Stir well until the mixture forms a smooth, consistent paste.
- Add the lavender essential oil and stir well.
- Add the dried rosemary leaves and stir well.
- Pour the mixture into a mold of your choice.
- Let it set for about 2 weeks before removing it from the mold.
Recipe 3: Citrus Burst Soap Recipe
Ingredients:
- 1 cup ground soap flakes
- 1/4 cup distilled water
- 10 drops lemon essential oil
- 1 tablespoon grated orange zest
Instructions:
- Combine the ground soap flakes with distilled water in a bowl.
- Stir well until the mixture forms a smooth, consistent paste.
- Add the lemon essential oil and stir well.
- Add the grated orange zest and stir well.
- Pour the mixture into a mold of your choice.
- Let it set for about 2 weeks before removing it from the mold.
Tips and Tricks
- Use a variety of herbs and spices to create unique fragrances and recipes.
- Experiment with different essential oils to find the perfect scent for your soap.
- Add natural colors to create unique and vibrant hues.
- Always follow proper curing times to ensure your soap is safe and effective.
Safety Precautions
- Always use caution when working with essential oils, as they can be irritating to skin and eyes.
- Wear protective gloves and goggles when handling soap flakes or other ingredients.
- Follow proper safety guidelines when using heat or chemicals in your soap-making process.
Conclusion
Creating soap with advanced flake sapon is a fun and creative way to reuse and recycle old soap flakes. By combining different herbs, spices, and essential oils, you can create unique fragrances and recipes that cater to your personal preferences. Whether you’re a seasoned soap maker or a beginner, this technique offers endless possibilities for experimentation and creativity.
FAQs
Q: What kind of ingredients can I use in my soap recipe?
A: You can use various herbs, spices, essential oils, and natural colors to create unique fragrances and recipes.
Q: How do I choose the right ratio of soap flakes to water?
A: The ideal ratio will depend on the desired consistency. Start with a small amount of water (about 1 cup) and add more as needed until you achieve the desired consistency.
Q: Can I use essential oils in my soap recipe?
A: Yes, essential oils can be used to create unique fragrances and recipes. However, always follow the recommended usage guidelines and avoid overusing them.
Q: How long does it take for the soap to cure?
A: It typically takes about 2 weeks for the soap to set and another week or two for it to fully cure.
Q: What are some common mistakes to avoid when making soap with advanced flake sapon?
A: Some common mistakes include using too much water, overusing essential oils, and not following proper curing times. Always follow the recommended guidelines and use caution when experimenting with new ingredients.


