
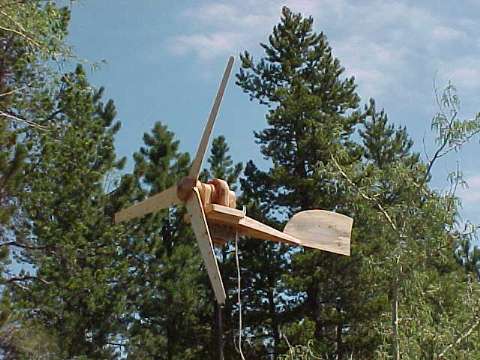
Building Wooden Wind Turbines: A Step-by-Step Guide
As we’ve seen before, building a wind turbine is just the beginning. Today, we’re going to take it to the next level by learning how to build wooden wind turbines. We’ll explore how to construct blades and harness the power of renewable energy.
Understanding Wind Turbine Design
Before we dive into the construction process, let’s understand the basics of wind turbine design. Our focus will be on a three-blade rotor, with a power output suitable for low-speed generators that produce clean energy.
Measuring Up: Blade Dimensions and TSR Ratio
To get started, we need to measure up our blades using guidelines from Scoraig Wind Electric. Here are the key dimensions:
- Diameter: 2.3 meters (7.5 feet)
- Tip Speed Ratio (TSR): approximately 5.5
- The good news is that you can adjust blade size by scaling up or down while maintaining a TSR ratio of around 5.5.
Gathering Tools and Materials
Now that we have our dimensions, let’s gather the necessary tools and materials for building wooden wind turbine blades:
Tools
- Hand saws (hand-cutting or bandsaws)
- Chisels
- Mallets
- Pencil sharpeners
- Leveling bubble
- Drill press
- Jigsaw or coping saw
Materials
- Softwoods with minimal knots and resin content (e.g., pine from Oregon)
- Thin wood slats for blade construction (approximately 150 x 50mm x 1150mm)
- Wood disks with a diameter of 300mm and a thickness of 12mm
- M8x90mm bolts
- 48 wooden screws (10mm x 1.5″)
Preparing the Workspace
To ensure smooth woodworking, set up your workspace by securing wood pieces to a workbench using clamps and vice grips. Use well-sharpened tools and maintain control during each cut.
Safety First
Always wear protective gear when working with sharp objects or power tools!
Now that we’ve covered the basics of building wooden wind turbine blades, let’s move on to assembling the rotor.
Assembling the Rotor
To construct the rotor, you’ll need:
- 3 wooden blade pieces
- Wood disks (12mm thick, 300mm diameter)
- M8x90mm bolts
- Wooden screws
Follow these steps for building a wind turbine rotor with wood disks and screws:
Step 1: Cutting Blade Pieces
Cut three equal-length blades from your chosen softwood. The optimal dimensions are 150 x 50mm x 1150mm.
Step 2: Creating the Rotor Hub
Use your jigsaw or coping saw to create a circular hole in one of the blade pieces, leaving enough space for the bolts and screws to secure it.
Step 3: Assembling the Rotator Blades
Attach wood disks (12mm thick, 300mm diameter) to each blade using M8x90mm bolts and screws. This will provide additional strength and stability to your blades.
Now that you’ve successfully built wooden wind turbine blades and assembled the rotor, it’s time for finishing touches!
Finishing Touches
To complete your wind turbine project, follow these steps:
Step 1: Sanding and Finishing
Sand all components thoroughly using progressively finer grits (120-220) to achieve a smooth finish. Apply wood sealant or paint according to the manufacturer’s instructions.
Step 2: Trimming Edges
Trim any rough edges or splinters from your blades using sandpaper, wire brushes, or files. Use this chance to add decorative details if you want!
Step 3: Installing Electrical Components
Install electrical components such as a generator and wiring according to the manufacturer’s instructions and your local building codes.
Conclusion
We hope this comprehensive guide has empowered you to build wooden wind turbines that harness renewable energy. Don’t forget to explore historical context, detailed explanations, and cultural nuances related to sustainable architecture!
Frequently Asked Questions
- What are some common types of wood used for building wind turbine blades?
- Softwoods like pine from Oregon or spruce fir
- How do I measure the Tip Speed Ratio (TSR) ratio in my wind turbine blade design?
- Calculate the TSR by dividing the blade tip speed by its hub speed. The result should be around 5.5 for our example.
- Can I use other materials besides wood to build my wind turbine blades?
- Yes, but it’s crucial to consider durability and weight when choosing alternative materials.
Feel free to ask your questions!
Hope you found this guide helpful!


