
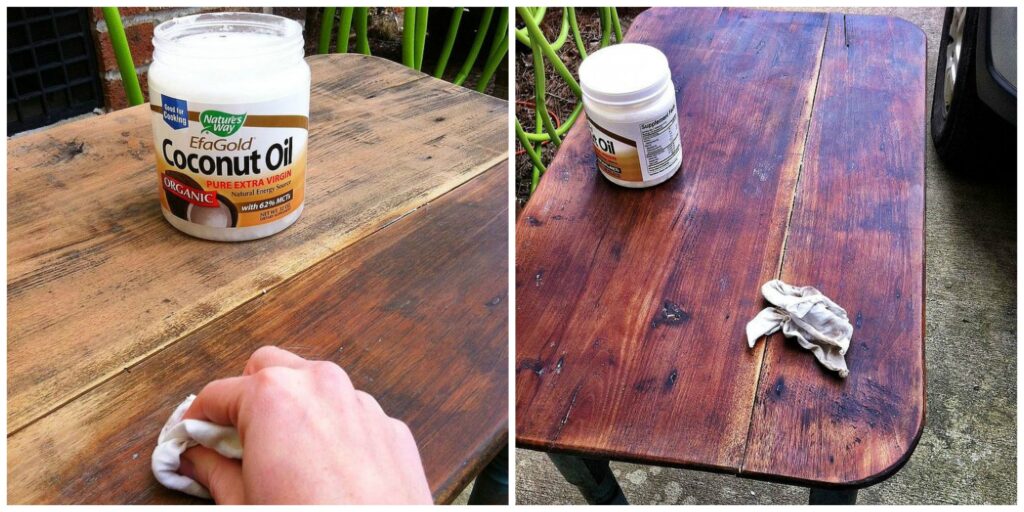
As we navigate the world of home decor and restoration, it’s hard not to fall in love with the timeless charm of wood surfaces. Whether it’s a vintage armchair, a reclaimed wooden table, or a beautifully crafted piece of furniture passed down through generations, wood has a unique ability to evoke emotions and tell stories.
However, over time, our beloved wood surfaces can become dull, faded, and worn out, losing their original luster and character. But fear not! With the right techniques, materials, and a bit of creativity, you can restore your wood surfaces to their former glory, making them look like new again.
The Art of Wood Restoration
Restoring wood is an art form that requires patience, attention to detail, and a deep understanding of the material. It’s not just about applying a coat of varnish or paint; it’s about understanding the unique characteristics of each piece of wood and working with its natural texture, grain, and color.
Whether you’re a seasoned DIY enthusiast or a novice looking to try your hand at restoration, this guide will walk you through the process of restoring wood surfaces using natural ingredients and techniques. From oil-based treatments to wax-based finishes, we’ll explore it all, providing you with the knowledge and inspiration needed to breathe new life into your treasured possessions.
The Importance of Understanding Wood Nature
Before we dive into the restoration process, it’s essential to understand the unique characteristics of each piece of wood. Different types of wood have distinct properties that affect their appearance, durability, and behavior over time. For example:
- Hardwoods like oak, maple, and walnut are denser and more resistant to wear and tear.
- Softwoods like pine, spruce, and fir are lighter and more prone to scratches and dents.
- Exotic woods like ebony, rosewood, and mahogany have distinct grain patterns and colors.
Understanding these characteristics will help you choose the right restoration techniques and materials for your specific project, ensuring that your wood surfaces look their best for years to come.
Restoring Wood Surfaces with Natural Ingredients
Now that we’ve covered the basics of wood nature, let’s dive into the fun part – restoring our beloved wood surfaces using natural ingredients! Here are some of our favorite DIY techniques and materials:
Olio di Fegato di Merluzzo
Even though it has a strong odor, oiled merluzzo liver oil is an excellent solution for covering scratches on wooden surfaces.
How to apply:
- Break open the cap of the oiled merluzzo liver oil.
- Squeeze the liquid onto the scratch or imperfection on the wooden surface.
- Let it sit for a few hours before wiping clean with a soft cloth.
Noci (Nuts)
A nut-based compound can be an excellent solution for covering scratches that make your wood surfaces appear older than they really are!
How to apply:
- Grind some nuts into a fine paste.
- Mix the ground nuts with a bit of water or oil.
- Apply the mixture to the scratch or imperfection and let it dry before wiping clean.
Cera (Wax)
Cera is an excellent product against scratches and other imperfections on wooden surfaces! It can also be mixed with varnishes to give your wood surfaces a beautiful, uniform color!
How to apply:
- Melt the cera using a hair dryer or heat gun.
- Apply the melted wax to the scratch or imperfection.
- Let it cool and harden before wiping clean.
Fondi di Caffè
The stains released by coffee grounds can help improve the appearance of your wooden surfaces!
How to apply:
- Soak the coffee grounds in water or oil.
- Apply the liquid mixture to the scratch or imperfection on the wooden surface.
- Let it sit for a few hours before wiping clean.
Aceto e Olio
Combining acetic acid with olive oil creates an excellent product that not only covers scratches but also protects your wood surfaces from external damage!
How to apply:
- Mix equal parts of acetic acid and olive oil.
- Apply the solution to the scratch or imperfection on the wooden surface.
- Let it sit for a few minutes before wiping clean.
Plastilina (Plasticine)
Believe it or not, plasticine can be an excellent material for covering scratches that ruin the appearance of your wood surfaces!
How to apply:
- Apply plasticine to the scratch or imperfection on the wooden surface.
- Use a nail polish remover to dissolve the plastic and reveal a smooth, restored surface.
Dentifricio e Olio
A combination of dentifricie with olive oil creates an excellent product for covering scratches and stains on your wood surfaces!
How to apply:
- Mix equal parts of dentifricie and olive oil.
- Apply the solution to the scratch or imperfection on the wooden surface.
- Let it sit for a few minutes before wiping clean.
Segatura e Colla
For deeper scratches, this simple combination of sawdust and glue can be an effective solution!
How to apply:
- Mix equal parts of sawdust and white glue.
- Apply the mixture to the scratch or imperfection on the wooden surface.
- Let it dry before sanding smooth.
Additional Natural Ingredients for Restoring Wood Surfaces
In addition to oiled merluzzo liver oil, nuts, cera, coffee grounds, acetic acid and olive oil, plasticine, dentifricie and oil, and sawdust and glue, there are several other natural ingredients you can use to restore your wood surfaces:
- Turpentine: A solvent that helps dissolve old finishes and varnishes.
- Linseed Oil: A plant-based oil used for finishing and protecting wood surfaces.
- Rice Bran Wax: A natural wax that provides a protective barrier against scratches and stains.
- Beeswax: A natural wax that can be mixed with other ingredients to create a protective finish.
- Tea Stains: Strong tea can help remove old finishes and varnishes, revealing the wood’s natural color.
Safety Precautions for Restoring Wood Surfaces
When working with natural ingredients, it’s essential to take safety precautions to avoid accidents and injuries. Here are some tips:
- Always wear protective gloves when applying natural ingredients to your skin.
- Wear a mask or respirator when using strong chemicals or solvents.
- Work in well-ventilated areas to prevent inhalation of fumes.
- Avoid touching your eyes or face after working with natural ingredients.
Restoring Wood Surfaces: A Step-by-Step Guide
Now that we’ve covered the basics and materials, let’s dive into a step-by-step guide on restoring wood surfaces:
- Prepare the surface: Clean the wooden surface thoroughly to remove dirt, grime, or old finishes.
- Assess the damage: Examine the damaged area to determine the extent of the damage.
- Choose the right material: Select a natural ingredient that suits your project and the type of wood you’re working with.
- Apply the treatment: Follow the instructions for applying the natural ingredient, making sure to follow any necessary safety precautions.
- Allow the treatment to dry: Let the treatment sit for the recommended amount of time before wiping clean or sanding smooth.
- Sand and finish: Use a fine-grit sandpaper to smooth out the surface, followed by a final coat of varnish or wax.
Conclusion
Restoring wood surfaces is a fun, rewarding process that requires patience, creativity, and attention to detail. By understanding the unique characteristics of each piece of wood and using natural ingredients, you can breathe new life into your treasured possessions!
So next time you look at an old piece of furniture or a wooden surface, remember that restoration is just a DIY project away. Get creative, get inspired, and let’s give our beloved wood surfaces the TLC they deserve!
Frequently Asked Questions (FAQs)
-
What are the most common types of wood used in restoration projects?
Wooden surfaces can be made from various materials such as oak, maple, pine, spruce, fir, ebony, rosewood, and many more! The type of wood will affect its appearance, durability, and behavior over time. -
Can I use any type of oil to restore my wooden surface?
No, not all oils are created equal when it comes to restoring wooden surfaces! Some oils may damage the finish or discolor certain types of wood. -
What is the best way to clean a restored wooden surface?
Cleaning and maintaining a restored wooden surface is crucial for its longevity!
-
Can I use varnish on my restored wooden surface?
Yes, you can use varnish! Apply it according to the manufacturer’s instructions for optimal results. -
How do I know when to stop restoring a wooden surface?
Stopping at the right time will ensure that your restoration is both effective and long-lasting! -
What are some common mistakes people make when restoring wood surfaces?
Restoring wood can be a delicate process, so it’s essential to avoid common mistakes! Avoid using harsh chemicals, excessive heat or cold, and improper drying times. -
How often should I apply a restorative treatment to my wooden surface?
The frequency of treatments will depend on how much the wood surface is used! -
Can I restore wood surfaces outdoors?
Yes, you can restore wood surfaces outdoors!


