
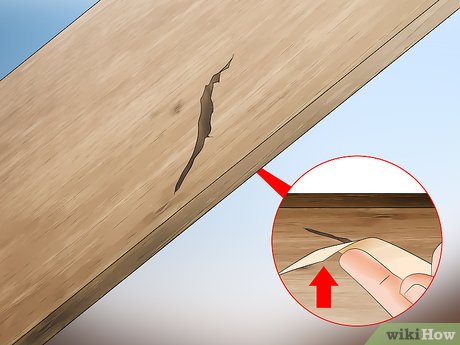
As we discussed the fundamentals of “how to glue wood,” let’s delve into one of the most common issues that homeowners face: gaps and fissures that form in wood. Understanding why these occur will help us tackle them effectively.
Why Do Gaps Form in Wood?
Unlike small, tight gaps, sometimes they seem like actual cracks. In reality, these are longitudinal fissures or splits that develop on wooden panels, massive timber beams (massello, noble wood, or layered wood), or even solid wood boards. These fissures usually follow the wood grain and can be either shallow, wide, or long… regardless of their depth, width, or length. The repair process involves filling these gaps with a putty or, better yet, resins.
Gaps in wood can occur due to various reasons such as:
- Exposure to moisture: Water damage can cause the wood to expand and contract, leading to cracks and fissures.
- Thermal expansion and contraction: As wood heats up and cools down, it expands and contracts, causing gaps to form.
- Poor installation: Improperly installed wood surfaces or panels can lead to gaps and fissures over time.
- Wear and tear: Repeated use and handling of the wooden surface can cause cracks and gaps.
Large Creases in Wood
When dealing with large creases or gaping holes in wood, the best solution is to use a thin strip and push it into the gap until it’s filled, then level and paint the surface. For particularly wide and deep crevices, though, applying putty or resin might not be enough.
If you encounter large creases, take a narrow strip of wood that you’ve treated with vinyl glue, insert it into the crease, and shape it until its thickness is perfectly even. The inserted strip must match the type of wood being repaired.
Filling Wood Gaps
When dealing with small gaps or fissures, use a putty specifically designed for wood or liquid resin seals.
A suitable putty for wood works by performing an adhesive function while also acting as an effective filler. There are various types of putties available in stores; choose one that’s treated similarly to the wood you’re repairing.
You can find wood putties and resins at most DIY stores or online retailers like Amazon, where you can get a good-quality product for just 12.08 euros with free shipping (check this page on Amazon).
Types of Wood Putty
When selecting a wood putty, consider the following factors:
- Type of wood: Different types of wood require different types of putty.
- Size and depth of gap: Choose a putty that’s suitable for the size and depth of the gap.
- Color and texture: Select a putty that matches the color and texture of the surrounding wood.
Some popular types of wood putty include:
- Polyurethane-based putties
- Acrylic-based putties
- Epoxy-based putties
Applying Wood Putty
The process depends on the size of the gap: if the gap is particularly wide, after applying putty, it’s essential to apply pressure using a press or clamp so that the putty acts as an adhesive and not just as a filler. If you don’t apply sufficient pressure, the putty will only fill in the space without creating a strong bond.
To begin with, spread a small amount of wood putty near the gap and use your fingers to press it into place until it’s fully filled. For larger gaps, however, it’s better to use a flat tool to exert even pressure while maintaining an angle (to ensure that you fill the gap completely) and then apply the opposite angle (to guarantee complete coverage).
Before the putty hardens, remove any excess with a damp sponge.
Allow the wood putty to fully dry before using a fine-grained sandpaper to level the surface perfectly. If you applied the putty by hand, you can use a sanded paper of 400 grit; if you used a paint scraper, begin with a 200 grit paper and then move on to a finer one (400).
Avoid using coarse sandpaper as it’s easy to remove the putty even after it has hardened. To achieve an evenly surfaced finish, consider painting or applying natural wax.
Natural Wax Finishing
After applying wood putty, apply a natural wax finish to protect the surface and enhance its appearance. Natural waxes such as beeswax, carnauba wax, or shellac can be applied using a cloth or brush.
The benefits of using natural wax include:
- Protection from moisture: Natural wax creates a barrier that protects the wood from moisture and humidity.
- Ease of application: Natural wax is easy to apply and can be buffed to create a smooth finish.
- Non-toxic: Natural wax is non-toxic and safe for use on food surfaces.
Liquid Resin Seals
If you’re looking for an alternative to putty, consider using liquid resin seals. Liquid resin seals work by filling the gap with a liquid resin that hardens over time.
The benefits of using liquid resin seals include:
- Fast drying: Liquid resin seals dry quickly, often in minutes.
- Strong adhesion: Liquid resin seals create a strong bond between the wood and surrounding surface.
- Versatility: Liquid resin seals can be used on various types of wood surfaces.
However, keep in mind that liquid resin seals may not be suitable for all types of wood or gaps. Always follow the manufacturer’s instructions and test the product before applying it to your wooden surface.
Tips and Tricks
Here are some tips and tricks to help you fill wood gaps effectively:
- Use a putty knife or scraper to spread the putty evenly.
- Apply even pressure when filling large gaps.
- Remove excess putty with a damp sponge before it hardens.
- Sand the surface carefully to avoid removing too much of the surrounding wood.
- Consider applying multiple coats of putty and sealant for optimal results.
Conclusion
Filling wood gaps is a common issue that can be easily addressed with the right tools and techniques. By understanding why gaps form in wood and choosing the right type of putty or resin, you can effectively repair longitudinal fissures and restore your wooden surface to its original glory. Remember to apply even pressure, remove excess putty carefully, and consider using natural wax or liquid resin seals for a durable finish. With these tips and tricks, you’ll be able to tackle wood gaps like a pro!


