
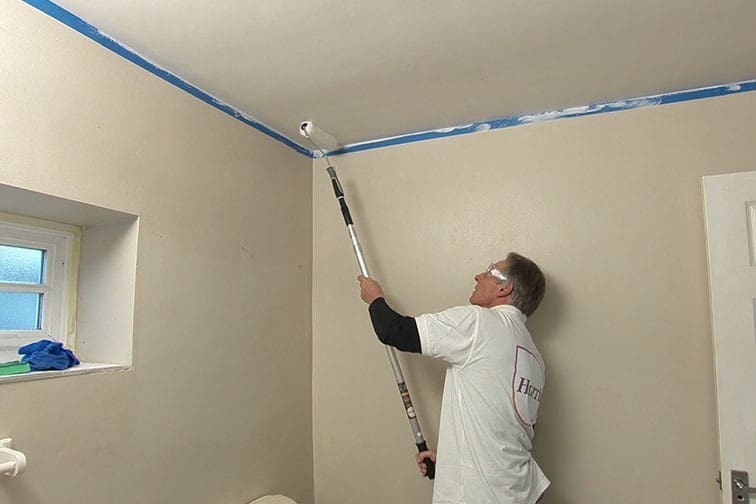
Painting a ceiling can seem like a daunting task, but with the right preparation and techniques, it can be a breeze. In this article, we will walk you through the process of painting a ceiling, from preparing the area to applying the final coat.
Before You Begin
Before starting the project, it’s essential to assess the condition of your ceiling. If your ceiling is old or has energy efficiency issues, it may require additional work, such as installing insulation panels. In most cases, however, you can simply remove any chandeliers, light fixtures, and other obstructions to begin the process.
Assessing Your Ceiling
Before starting the project, take a closer look at your ceiling. Check for any signs of water damage, cracks, or holes. If you notice any stains or discoloration, it’s essential to address them before painting. You can use a cleaning solution and rags to wipe away any dirt or grime.
Preparing Your Tools and Materials
Before starting the painting process, gather all the necessary materials:
- Drop cloths or tarps
- Plastic sheets or plastic bags
- Nails or screws for securing drop cloths
- Sandpaper or a sanding block
- Cleaning solution and rags
- Paintbrushes (various sizes)
- Paint roller extension pole
- Paint tray
- Paint (choose your desired color and finish)
- Primer (optional)
Protecting Your Belongings
To ensure a safe and successful project, it’s crucial to protect your belongings. Move furniture away from walls and cover them with plastic sheets or tarps. Remove curtains and blinds, as well as lamp shades and light fixtures. If you have a drop ceiling, you may need to remove the grid system as well.
Protecting Your Painted Ceiling
To ensure that your newly painted ceiling remains protected, apply a clear coat of paint specifically designed for ceilings. This will help prevent any water damage or stains from occurring in the future.
Materials Needed: In-Depth
Here is a more detailed list of materials needed to paint a ceiling:
- Paint: The type and color of paint you choose will depend on your personal preferences and the style of your home.
- Latex paint is a popular choice for ceilings due to its ease of use and durability.
- Oil-based paint is also an option, but it’s best suited for areas that are prone to moisture or wear and tear.
- Primer: Primer helps create a smooth surface for painting and can help extend the life of your ceiling.
- Use a primer specifically designed for ceilings if you’re looking to prevent stains or discoloration from occurring.
- Paintbrushes: Paintbrushes come in various sizes, but you’ll need a smaller brush for cutting in along edges.
- Roller extension pole: This is used to apply paint evenly and efficiently across large areas of the ceiling.
- Drop cloths or tarps: Protect your furniture and floors from any spills or messes during the painting process.
Preparing Your Ceiling: In-Depth
Before you start painting, it’s essential to prepare your ceiling for painting. This involves:
- Removing old paint and debris: Use sandpaper or a sanding block to remove any loose flakes of paint or debris.
- Cleaning the surface: Use a cleaning solution and rags to wipe away any dirt, grime, or stains on the ceiling surface.
- Fixing holes and cracks: If you notice any holes or cracks in your ceiling, use spackling compound or joint compound to fill them in.
Patching Holes and Cracks
To patch holes and cracks in your ceiling:
- Apply a mixture of spackling compound and water to the affected area.
- Use a putty knife or trowel to spread the compound evenly across the surface.
- Allow the compound to dry completely before sanding it down.
Tackling Mould and Mildew
If your ceiling is suffering from mould or mildew, you’ll need to treat it with an antimould spray or solution:
- Follow the manufacturer’s instructions for application and drying times.
- Use a clear coat of paint specifically designed to combat moisture on your newly painted ceiling.
Frequently Asked Questions
Here are some frequently asked questions about painting a ceiling:
- How do I remove old paint from my ceiling?
- Use a sanding block or fine-grit sandpaper to wear down the old paint.
- Can I use a single coat of paint for my ceiling?
- It’s recommended to apply multiple coats, allowing each coat to dry before applying the next one.
- How do I prevent mould and mildew from growing on my ceiling?
- Use an antimould spray or solution specifically designed for this purpose.
- Can I use a waterproofing paint on my ceiling?
- Yes, but make sure to choose a primer and paint that are compatible with each other.
- How long does it take for paint to dry completely on my ceiling?
- The drying time will depend on the type of paint used, as well as environmental conditions like temperature and humidity.
Tips and Tricks
Here are some additional tips and tricks to help you achieve a professional-looking finish:
- Use high-quality materials: Invest in good-quality paint, brushes, and rollers for the best results.
- Work from top to bottom: When painting, always start at the top of your ceiling and work down to prevent drips or spills.
- Avoid using too much pressure: Avoid applying too much pressure when rolling out the paint, as this can create uneven finishes.
Safety Precautions
Painting a ceiling requires some basic safety precautions:
- Work in well-ventilated areas: Open windows and use fans to ensure good airflow while painting.
- Wear protective gear: Wear gloves, goggles, and a mask to protect yourself from paint fumes and stains.
By following these steps and tips, you can achieve a professional-looking finish on your ceiling.


