
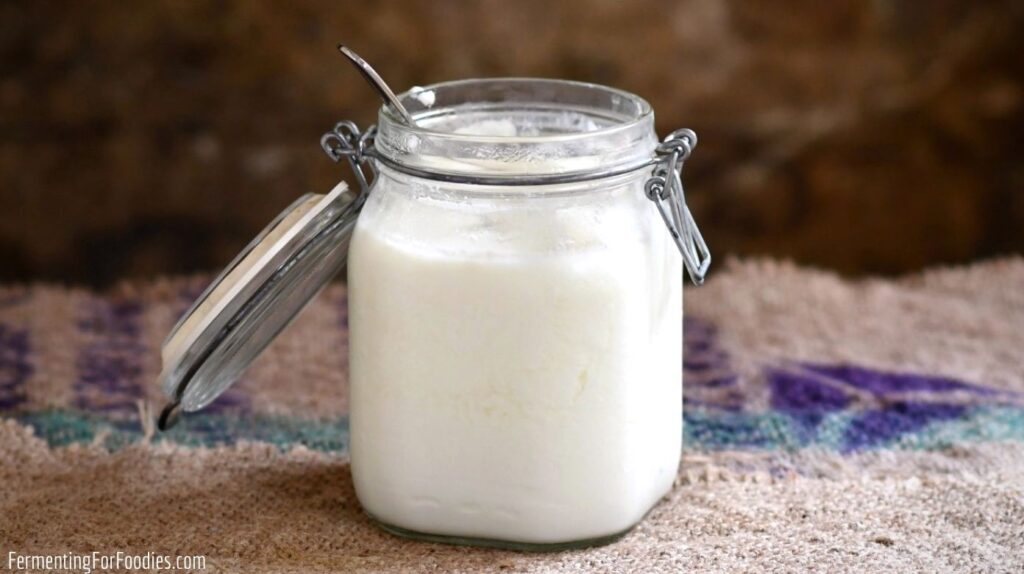
Are you craving yogurt on the spot, but don’t have an instant yogurt maker? Don’t worry! You can easily make yogurt at home without any special equipment. In this article, we’ll delve into the benefits of homemade yogurt, provide a step-by-step guide to making it, and offer expert tips for achieving the perfect texture and flavor.
Benefits of Homemade Yogurt
Before we dive into the nitty-gritty of making yogurt at home, let’s talk about the advantages. One of the most significant benefits is that you have complete control over the ingredients and processing methods used in your yogurt. This means you can avoid added preservatives, sugars, and artificial flavorings often found in commercial yogurts.
Homemade yogurt is also more cost-effective than buying it from stores. By using fresh milk and simple equipment, you can produce high-quality yogurt at a fraction of the cost. Plus, you can customize your yogurt to your taste preferences – whether that means adding honey, fruit, or nuts.
The Science Behind Yogurt Making
Yogurt is made by adding bacteria (Lactobacillus bulgaricus and Streptococcus thermophilus) to milk, which causes the milk to ferment. This process thickens the milk, creating a creamy and tangy texture that we all know and love.
To make yogurt at home, you’ll need to heat the milk to a temperature that’s hot enough to kill any existing bacteria (around 180°F to 185°F), then cool it down to a temperature that’s suitable for incubation (around 110°F to 120°F). Once the milk is cooled, you can add the yogurt starter culture and incubate the mixture at a warm temperature (around 100°F to 110°F) for several hours.
Making Yogurt at Home: A Step-by-Step Guide
If you’re new to making yogurt, don’t worry; it’s easier than you think! Here’s a basic recipe to get you started:
Ingredients:
- 1 quart of milk (whole, low-fat, or nonfat)
- 1/4 cup of plain yogurt with live cultures (store-bought or homemade)
- Optional: sweetener, flavorings, or mix-ins
Equipment:
- Large pot
- Thermometer
- Glass jars or containers with lids
- Cheesecloth or a clean cotton cloth
- Incubator or warm water bath
Instructions:
- Heat the Milk: Pour the milk into a large pot and heat it over medium heat until it reaches 180°F to 185°F (82°C to 85°C). Hold the temperature for 5 minutes to kill any bacteria that may be present.
- Cool the Milk: Let the milk cool down to 110°F to 120°F (43°C to 49°C). This is an important step, as the cultures won’t grow if the milk is too hot or too cold.
- Add the Starter Culture: Once the milk has cooled, add the yogurt with live cultures. Whisk gently to combine.
- Incubate the Mixture: Pour the mixture into glass jars or containers and cover them with cheesecloth or a clean cotton cloth. Create a warm environment for the mixture to incubate – such as the oven with the light on or a yogurt maker (if you have one!). Let it sit at 100°F to 110°F (38°C to 43°C) for 6 to 8 hours.
- Chill and Store: After the incubation period, refrigerate the yogurt to chill. Once chilled, transfer it to an airtight container and store it in the fridge.
Tips for Achieving the Perfect Texture
Achieving the perfect texture can be tricky, but don’t worry; we’ve got some tips to help you out:
- Use the Right Milk: Whole milk will give you a thicker yogurt than low-fat or nonfat milk. If you prefer a thinner consistency, use more milk.
- Adjust the Incubation Time: The length of time you incubate your mixture can affect the thickness and texture of your yogurt. Experiment with different times to find what works best for you.
- Watch for Over-Thickening: Be careful not to over-incubate your yogurt, as it can become too thick and gel-like.
- Experiment with Different Milks: Try using almond milk, soy milk, or coconut milk to create a dairy-free yogurt alternative.
Customizing Your Yogurt
Now that you’ve made some delicious homemade yogurt, it’s time to customize it! Here are a few ideas to get you started:
- Add Sweetener or Flavorings: Try adding honey, maple syrup, or your favorite flavorings like vanilla or cinnamon.
- Mix in Fresh Fruit or Nuts: Add some fresh fruit, nuts, or seeds for added texture and flavor.
- Experiment with Different Milks: Try using almond milk, soy milk, or coconut milk to create a dairy-free yogurt alternative.
Common Challenges and Solutions
Making yogurt at home can be a bit tricky, but don’t worry; we’ve got some common challenges and solutions to help you out:
- Milk Spoilage: If your milk spoils during the incubation period, it may have an off flavor or texture. To avoid this, make sure to use fresh milk and keep the mixture at a consistent temperature.
- Over-Thickening: If your yogurt becomes too thick, try adding a little more milk to thin it out.
- Under-Thickening: If your yogurt is too thin, try incubating it for a longer period of time.
Conclusion
Making yogurt at home without a yogurt maker is easier than you think. With the right equipment, ingredients, and a little patience, you can create delicious, high-quality yogurt that suits your taste preferences. Experiment with different recipes and techniques to find what works best for you. Happy yogurt-making!
Frequently Asked Questions (FAQs)
Q: Can I use any type of milk?
A: Yes! You can use whole, low-fat, or nonfat milk as a base for your homemade yogurt.
Q: How long does it take to incubate the mixture?
A: The length of time you incubate your mixture will depend on the temperature and desired thickness of your yogurt. Experiment with different times to find what works best for you.
Q: Can I use store-bought yogurt as a starter culture?
A: Yes! You can use store-bought yogurt as a starter culture, but make sure it contains live cultures (Lactobacillus bulgaricus and Streptococcus thermophilus).
Q: How do I prevent over-thickening?
A: To prevent over-thickening, keep an eye on the temperature of your milk and avoid over-incubating the mixture.
Q: Can I make yogurt with a different type of culture?
A: Yes! You can experiment with different types of cultures, such as probiotic powder or Greek yogurt starter, to create unique flavor profiles.
Q: How long does homemade yogurt last in the fridge?
A: Homemade yogurt typically lasts for 1-2 weeks in the fridge. After that, it may start to spoil.
Q: Can I make yogurt without a thermometer?
A: While a thermometer is helpful for monitoring the temperature of your milk, you can still make yogurt without one. Simply use your best judgment and adjust the incubation time accordingly.


