
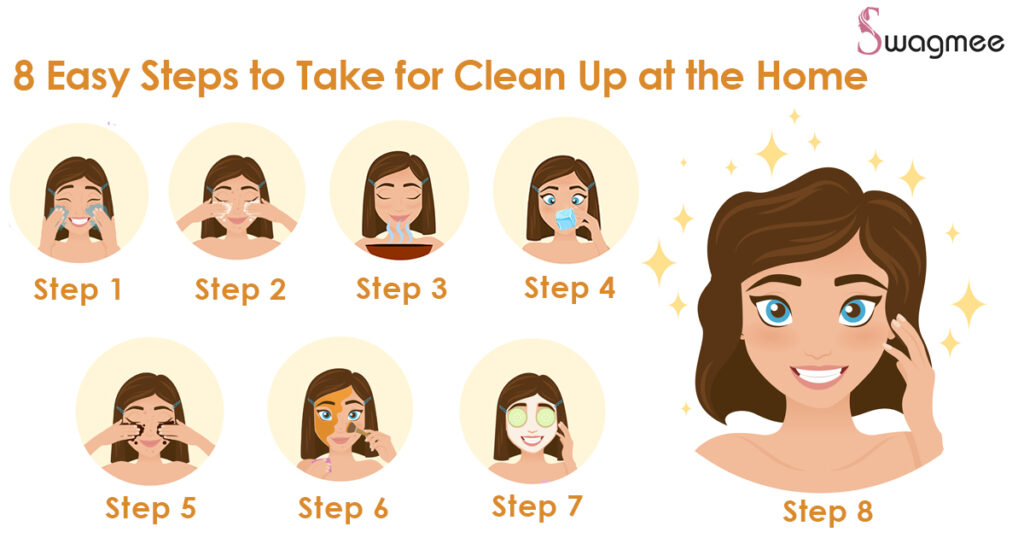
Having a regular face cleaning routine is essential for maintaining healthy and glowing skin. However, not everyone has access to professional estheticians or can afford expensive skincare treatments. Fortunately, you can achieve great results with the right methods and ingredients, making it easy to clean your face at home.
While professional facials are beneficial, especially for individuals with specific skin concerns, DIY face cleaning is a cost-effective alternative that can produce amazing results. With the right techniques and products, you can maintain healthy, balanced, and radiant skin from the comfort of your own home.
Understanding Your Skin Type
Before starting any skincare routine, it’s essential to understand your skin type. There are five main categories: normal, dry, oily, combination, and sensitive. Understanding your skin type will help you choose the right products and techniques for your face cleaning routine.
- Normal skin is balanced, neither too oily nor too dry.
- Dry skin lacks moisture, feeling tight and flaky.
- Oily skin has an overproduction of sebum, leading to a greasy appearance.
- Combination skin is a mix of both oily and dry skin, typically on the T-zone (forehead, nose, and chin).
- Sensitive skin reacts easily to products or environmental factors.
Step-by-Step Guide to Cleaning Your Face at Home
Step 1: Steam Treatment
Begin by creating a steam treatment using hot water, lemons, and essential oils like lavender or peppermint. Fill a clean bowl with boiling water, add slices of fresh lemon and a few drops of your preferred essential oil. Place a towel over your face and lean in to allow the vapor to penetrate deep into your skin. Stay for about 15 minutes.
Step 2: Blackhead Removal
Next, focus on blackheads or acne spots by steaming them away. Wear gloves during this step as it can be a bit harsh on the skin. After steaming, apply a toner that will help reduce inflammation and promote healing. For those with thicker skin, you can add a gentle exfoliating treatment like sugar and honey to further clean out pores.
Step 3: Masking and Relaxation
Now it’s time for a soothing face mask made from natural ingredients. If you’re comfortable making your own masks at home, try combining grated apple, yogurt, and honey to create a nourishing paste. Apply the mask evenly across your face, covering all areas thoroughly. Let it sit for at least 10 minutes before rinsing with warm water.
To enhance relaxation, prepare a strong chamomile tea bag and gently press its dampened cotton patches onto your closed eyes during the mask application time. This helps ease tension and allows your skin to absorb all the beneficial ingredients from your mask more effectively.
Step 4: Post-Cleaning Routine
After removing your face mask, wash your face thoroughly with warm water using a gentle cleanser suitable for your skin type. Apply a moisturizer that incorporates natural ingredients to lock in moisture and protect your skin from environmental stressors.
Benefits of DIY Face Cleaning at Home
- Economical: No more spending money on professional treatments or high-end skincare products.
- Customizable: Tailor your routine to meet the specific needs of your skin type.
- Environmentally Friendly: Reduce waste and avoid harsh chemicals found in commercial skincare products.
How Often to Clean Your Face at Home
It’s recommended to clean your face one time a week, but you can alternate between professional treatments and DIY sessions if you prefer a more balanced routine. Regular cleansing helps maintain healthy skin by removing dirt, bacteria, and other impurities that could otherwise clog pores or cause irritation.
Frequently Asked Questions (FAQs) on Cleaning Your Face at Home
Q: What ingredients should I use for my face mask?
A: Natural ingredients like honey, yogurt, apple pulp, and tea can provide nourishment and relaxation benefits. Research what works best for your skin type to ensure optimal results.
Q: Can DIY face masks cause irritation or allergic reactions?
A: Be cautious when introducing new ingredients, especially if you have sensitive skin. Always do a patch test before applying any mask to check for adverse reactions.
Q: How do I remove blackheads and acne naturally?
A: Combine steaming with gentle exfoliation using natural ingredients like sugar or salt to promote the removal of blackheads and acne.
Q: What’s the difference between cleansing my face at home versus going to a salon?
A: Salon treatments typically include more intensive treatments, personalized advice from professionals, and access to higher-end products. However, with proper DIY techniques and knowledge, you can achieve similar results without breaking the bank.
By incorporating these steps into your skincare routine, you’ll be on your way to maintaining healthy, radiant skin without needing to visit an esthetician regularly. Remember, consistency is key, so make cleaning your face at home a part of your weekly self-care regimen.


