
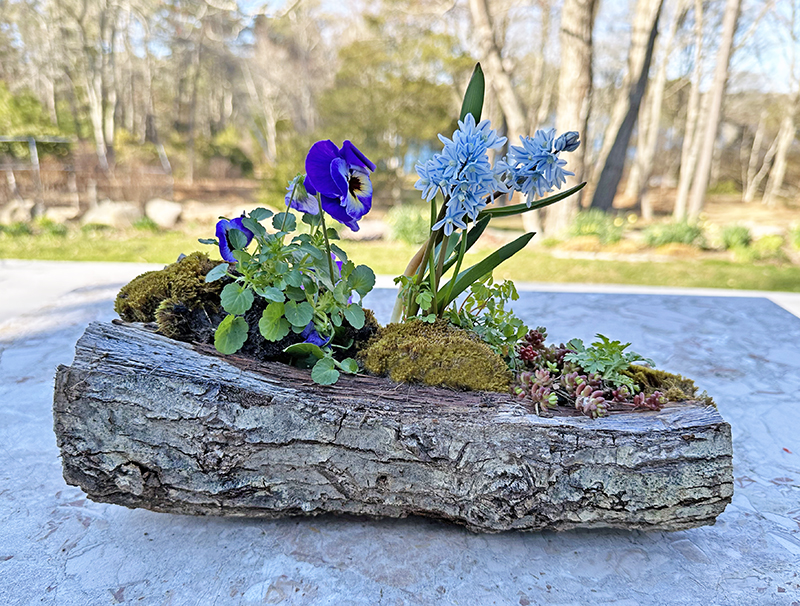
Are you interested in building your own garden planter using an old tree trunk? Constructing a garden planter from a tree trunk is not a complicated or prohibitive task. All it takes is a chainsaw and some physical strength. In this article, we will show you how to build a garden planter from a tree trunk step by step.
What You’ll Need to Build a Garden Planter from a Tree Trunk
- Chainsaw (or saw)
- Timber (tree trunk) for carving
- Chisel and hammer
- Wood impregnant
- Drill with wood bit
- Abrasive sponge
- Pen
- Safety gloves
- Safety goggles
- Measuring tape
- Square
Safety Precautions:
Before starting your project, ensure that you have the necessary safety gear. Wear safety gloves and safety goggles to protect yourself from sawdust, splinters, and other hazards.
Step-by-Step Instructions: Building a Garden Planter from a Tree Trunk
Step 1: Mark the Outer Circle of the Trunk
Using a pen, mark the outer circle of the trunk that you want to carve into. This will help you visualize your planter’s shape and ensure it fits in the space where you’ll be placing it.
Tips for Measuring:
- Use a measuring tape to measure the diameter of the tree trunk.
- Consider using a square to check if the lines are straight and evenly spaced.
- Make sure to mark the outer circle on both sides of the trunk, as this will provide stability during carving.
Step 2: Position the Trunk on a Stable Surface
Position the tree trunk on a solid and stable surface. Ensure that the surface is level and won’t shift or move while you’re working on your planter.
Tips for Choosing a Work Area:
- Choose an area with plenty of room to work around the trunk.
- Consider using a sawhorses or a sturdy table to elevate the tree trunk and improve visibility.
- Ensure that there are no obstructions nearby, such as windows, doors, or other objects that could obstruct your view.
Step 3: Make Central Cuts to Create Easy-Removing Planks
Using a chainsaw, make central cuts along the marked outer circle. The cuts should be made at a depth that allows for easy removal of planks without cutting into the outer edge of the circle. You can use a chisel and hammer if desired.
Tips for Making Central Cuts:
- Use a chainsaw with a sturdy bar and sharp blade to ensure clean cuts.
- Make sure to keep your chainsaw well-maintained and clean to prevent accidents.
- Consider making small test cuts in a scrap piece of wood before cutting into the tree trunk.
Step 4: Cut Along the Outer Circle to Create the Planter
Cut along the outer circle, following the previously marked line. This will create the planter’s shape. The cuts should be made at a depth that suits your needs for drainage and water circulation.
Tips for Cutting Along the Outer Circle:
- Use a chainsaw with a long bar to cut along the entire length of the trunk.
- Make sure to keep your chainsaw well-maintained and clean to prevent accidents.
- Consider using a sawhorses or a sturdy table to elevate the tree trunk and improve visibility.
Step 5: Remove Small Pieces of Wood Using Chisels and Hammers
Using chisels and hammers, carefully remove small pieces of wood from within the cutouts to create an even surface.
Tips for Removing Small Pieces of Wood:
- Use a chisel with a flat edge to scrape away small pieces of wood.
- Apply gentle pressure and use a hammer to tap the chisel into place.
- Consider using a pry bar or other tool to help remove small pieces of wood.
Step 6: Clean Up and Level the Bottom
Clean up any remaining debris and level the bottom of the planter using a shovel or trowel. Create drainage holes by drilling through the wood, if desired.
Tips for Cleaning Up:
- Use a broom or other cleaning tool to sweep away sawdust and debris.
- Wear protective gear, including safety gloves and safety goggles, when handling sharp objects like chisels and hammers.
- Consider using a dust mask to reduce inhalation of sawdust and wood particles.
Step 7: Smooth the Surface with Sandpaper
Use an abrasive sponge or sandpaper to smooth out the surface of the planter. This will help create a more finished look.
Tips for Smoothing the Surface:
- Use a coarse-grit sandpaper to remove any rough edges or splinters.
- Gradually switch to finer grits of sandpaper to achieve a smooth finish.
- Consider using an abrasive sponge to avoid scratches and marks on the wood surface.
Step 8: Apply Wood Impregnant
Apply wood impregnant to both the exterior and interior of the planter. This will provide protection against environmental damage, ensuring your planter lasts for years to come. Let it dry for several days in a well-ventilated area.
Tips for Applying Wood Impregnant:
- Use a brush or roller to apply the impregnant evenly and thoroughly.
- Follow the manufacturer’s instructions for application rates and drying times.
- Consider using a clear coat of finish to seal the wood after applying the impregnant.
Now Your Planter is Complete!
You can now fill your planter with soil and plants of your choice. Consider planting aromatic herbs that are useful in cooking or other ornamentally decorative options. Planting flowers, vegetables, or other fruits also works well in these planters!
Useful Tips for Building a Garden Planter from a Tree Trunk
- If the trunk has holes or is damaged, apply an antitarl or wood paste to ensure better adhesion of the impregnant.
- Check out our article about using tree trunks as planters: https://www.troep.com/tronco-di-palma-per-fioriere
- Consider adding a lid or other closure mechanism to your planter to improve functionality and security.
Frequently Asked Questions
Q1: Can I use any type of wood for building a garden planter?
A1: Yes, but ensure that the wood is suitable for outdoor use and has not been treated with chemicals that can harm your plants.
Q2: How do I choose the right size for my garden planter?
A2: Consider the space where you’ll be placing the planter. A good rule of thumb is to choose a planter that fits comfortably within the available area.
Q3: What types of plants are well-suited for building a garden planter from a tree trunk?
A3: Choose plants that thrive in outdoor environments, such as herbs, vegetables, flowers, and trees.
Q4: Can I use any type of material to seal the wood impregnant?
A4: No, it’s recommended to use only water-based or non-toxic materials for sealing the wood to ensure plant health.
Q5: How long does the process take to complete a garden planter from a tree trunk?
A5: This depends on the size of your project. On average, it takes several hours to build a small planter and several days for drying time.
Q6: Is using tree trunks as planters a sustainable option?
A6: Yes, as long as you properly prepare and seal the wood, tree trunks can be an excellent and eco-friendly alternative to traditional planters.


