
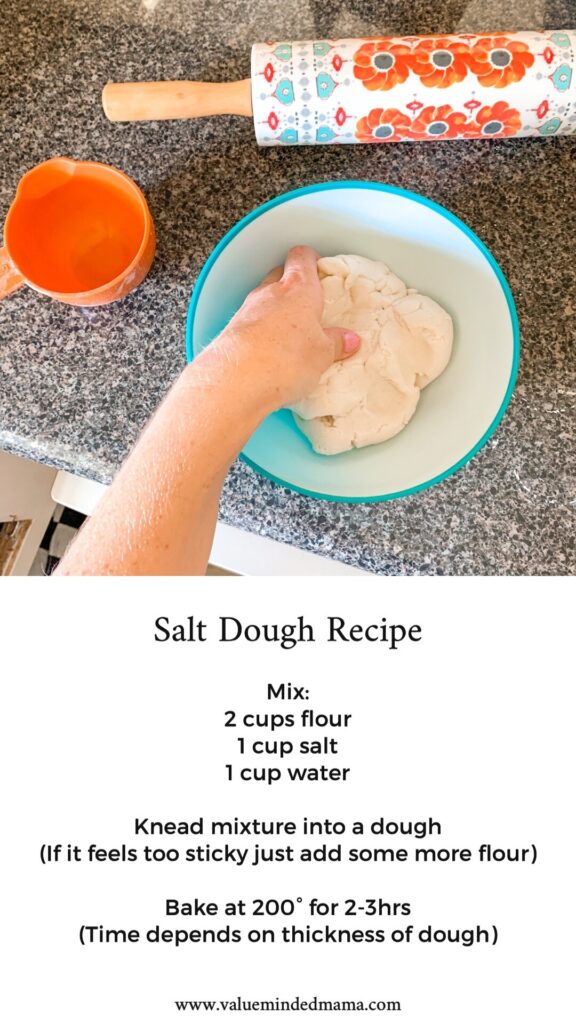
Salt dough is a versatile and easy-to-make craft material that can be used to create a wide range of objects, from decorative items like ornaments and figurines to functional pieces like small containers and decorations. In this article, we’ll explore the world of homemade salt dough, including its benefits, recipes, and techniques for creating beautiful and durable projects.
What is Salt Dough?
Salt dough is a type of non-toxic, edible clay made from flour, water, salt, and sometimes other ingredients like cream of tartar or baking soda. It’s a great medium for kids to express their creativity, as it can be molded, shaped, and decorated in countless ways.
Benefits of Making Salt Dough
Making salt dough is an excellent way to encourage children’s creativity, fine motor skills, and problem-solving abilities. Here are some benefits of making salt dough:
- Encourages creativity and self-expression: Salt dough allows kids to think outside the box and come up with unique and imaginative designs.
- Develops fine motor skills through molding and shaping: The process of manipulating the dough helps children develop their hand-eye coordination and fine motor control.
- Fosters problem-solving skills through experimentation with different shapes and designs: Kids can try out various techniques, such as rolling out the dough or using tools to shape it, to achieve the desired outcome.
- Promotes physical activity and hand-eye coordination: Kneading and shaping the dough can be a fun and engaging way for kids to get some exercise while developing their motor skills.
Recipe for Homemade Salt Dough
Here’s a simple recipe for making homemade salt dough:
Ingredients:
1. 2 cups of all-purpose flour
2. 1/4 cup of fine sea salt or kosher salt
3. 1/4 cup of water
4. 2 tablespoons of vegetable oil
5. 2 tablespoons of cream of tartar (optional)
Instructions:
1. In a large bowl, combine the flour and salt.
2. Gradually add in the water while mixing with a spoon until a dough forms.
3. Add in the vegetable oil and cream of tartar (if using) and continue to mix until the dough is smooth and consistent.
Tips for Working with Salt Dough
Here are some tips to keep in mind when working with salt dough:
- Make sure to wash your hands thoroughly before and after handling the dough.
- Work on a surface that’s easy to clean, like a countertop or tablecloth.
- Use a rolling pin or other tool to shape and smooth out the dough.
- Allow the finished projects to dry completely before painting or decorating.
Curing Salt Dough Projects
To bring out the full potential of salt dough, you need to cure them properly. Here’s how:
- Allow the dried salt dough objects to air-dry for several days: This will help prevent moisture from accumulating and causing damage.
- If desired, apply a coat of varnish or sealant to protect the object from moisture: This can help preserve the project and make it more durable.
Coloring and Decorating Salt Dough
Once your salt dough project is dry, it’s time to add some color and decoration. Here are some tips:
- Use food coloring or tempera paint to tint the salt dough before it dries: This will give you a wide range of colors to choose from.
- Apply a coat of varnish or sealant after painting to protect the object from moisture: This will help prevent the color from fading and make the project more durable.
Advanced Techniques for Salt Dough
If you’re looking to take your salt dough projects to the next level, here are some advanced techniques to try:
- Add texture with materials like glitter, sequins, or small objects: This can add an extra layer of interest to your projects.
- Use different shapes and sizes of tools to create unique textures and patterns: Experimenting with different tools can help you achieve a wide range of effects.
- Create 3D sculptures by stacking multiple layers of salt dough: This can be a fun and challenging way to create complex designs.
Tips for Working with Children
If you’re working with children, here are some tips to keep in mind:
- Encourage their creativity and imagination: Let them come up with their own ideas and designs.
- Provide guidance and support as needed: If they need help shaping or smoothing out the dough, be available to offer assistance.
- Emphasize the importance of safety: Remind them to wash their hands before and after handling the dough and to avoid eating it.
Conclusion
Making salt dough is an excellent way to encourage creativity, fine motor skills, and problem-solving abilities in children while creating fun and durable projects. With a simple recipe and some basic tools, you can get started on your first salt dough project today! Whether you’re looking for a creative outlet or a fun activity for kids, homemade salt dough is sure to deliver.
Salt Dough Projects for Kids
Here are some fun and easy salt dough projects that kids will love:
- Decorative ornaments: Use salt dough to create beautiful and unique ornaments for the Christmas tree or other special occasions.
- Figurines: Create cute and colorful figurines using different shapes and designs.
- Small containers: Use salt dough to create small containers, such as vases or bowls, that can be used for storing small items.
Salt Dough Projects for Adults
If you’re looking for more advanced salt dough projects, here are some ideas:
- Sculptures: Create complex and intricate sculptures using different shapes and designs.
- Jewelry: Use salt dough to create unique and beautiful jewelry pieces, such as earrings or necklaces.
- Decorative items: Create decorative items, such as coasters or candle holders, that can add a touch of personality to any room.
Tips for Displaying Salt Dough Projects
Once your salt dough projects are complete, here are some tips for displaying them:
- Use a variety of display methods: Consider using different techniques, such as placing the objects on a shelf or in a vase, to create a visually interesting display.
- Emphasize the texture and detail: Highlight the unique textures and details of each project by displaying them in a way that showcases these features.
- Create a themed display: Group similar projects together to create a themed display that adds an extra layer of interest.


