
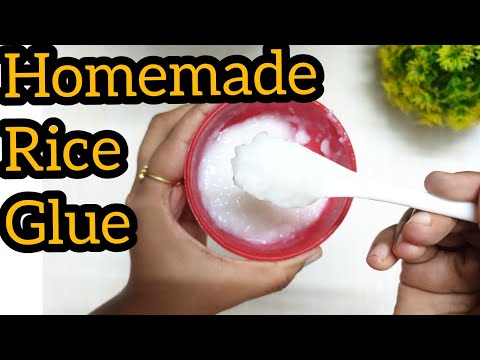
Have you ever wondered about the magic of rice paste, also known as rice adhesive or rice glue? This ancient Japanese art form has been used for centuries to create beautiful kanzashi hair ornaments, paper crafts, and other creative projects. In this article, we’ll explore the world of homemade rice paste and provide a step-by-step guide on how to make it yourself.
What is Rice Paste?
Rice paste is a natural adhesive made from cooked rice and water. It’s biodegradable, non-toxic, and can be easily customized to suit your creative needs. Unlike commercial adhesives, rice paste is environmentally friendly and won’t harm your skin or the environment.
Benefits of Rice Paste
So, why use rice paste? Here are some benefits:
- Transparency: Rice paste is almost transparent, making it perfect for delicate paper crafts.
- Drying time: It dries quickly, allowing you to work on your project without waiting too long.
- Non-toxic: It’s safe to use and won’t cause any allergic reactions or skin irritation.
Making Your Own Rice Paste
To make homemade rice paste, you’ll need just two ingredients: cooked rice and water. Here’s a simple recipe:
Ingredients:
- 1 cup cooked white or brown rice (preferably sticky or chewy)
- 3-4 cups water
Instructions:
- Cook the rice according to package instructions.
- Gradually add water to the cooked rice while stirring with a wooden spoon until you get the desired consistency. You may need to adjust the amount of water depending on how thick or thin you want your paste to be.
Tips and Variations
Here are some tips and variations to keep in mind:
- Use the right type of rice: Short-grain rice, like Japanese mochigome, works best for making rice paste.
- Adjust the water ratio: You can add more or less water depending on how thick or thin you want your paste to be.
- Add a binding agent: If you find that your paste is too runny, try adding a small amount of cornstarch or tapioca starch to help it bind better.
Using Your Rice Paste
Now that you have your homemade rice paste, here are some creative ways to use it:
- Paper crafts: Use your rice paste to attach paper decorations, flowers, or other embellishments to your cards, scrapbook pages, or origami creations.
- Decoupage: Apply a thin layer of rice paste to your surface and attach cut-out images, like paper cutouts or magazine clippings.
- Collage: Mix rice paste with paint or ink to create unique textures and effects in your artwork.
Advanced Techniques
Once you’re comfortable using your homemade rice paste, you can experiment with advanced techniques:
- Mixing colors: Add food coloring or natural dyes to your rice paste for a range of vibrant hues.
- Layering textures: Use different types of paper, fabric, or other materials to create intricate textures and patterns.
- Experimenting with ratios: Adjust the ratio of cooked rice to water to achieve unique properties in your paste.
Safety Precautions
When working with homemade rice paste, keep these safety precautions in mind:
- Handling heat: Be careful when handling hot surfaces or materials that can cause burns.
- Avoiding contamination: Keep your workspace clean and avoid cross-contaminating your rice paste with other substances.
- Using protective gear: Wear gloves and goggles to protect yourself from any accidental splashes.
Common Mistakes
Here are some common mistakes to avoid when making homemade rice paste:
- Overmixing: Avoid overmixing the cooked rice and water, as this can create an uneven consistency.
- Insufficient drying time: Make sure your rice paste has enough time to dry completely before applying it to your project.
- Using low-quality ingredients: Use high-quality ingredients, like short-grain rice, for the best results.
Conclusion
Homemade rice paste is a simple, versatile, and eco-friendly adhesive that can open up new creative possibilities for you. With just two ingredients and a few basic steps, you can start making your own rice paste today!
Frequently Asked Questions
Here are some common questions about homemade rice paste:
Q: What type of rice should I use to make rice paste?
A: Short-grain rice, like Japanese mochigome, works best for making rice paste.
Q: How much water do I need to add to the cooked rice?
A: You’ll need to adjust the amount of water depending on how thick or thin you want your paste to be. Start with 3-4 cups and add more as needed.
Q: Can I use rice paste on other materials besides paper?
A: Yes, but you may need to experiment with different ratios and adhesives to get the desired results.
Q: How long does homemade rice paste take to dry?
A: It usually dries quickly, depending on the thickness of the application and environmental conditions.


