
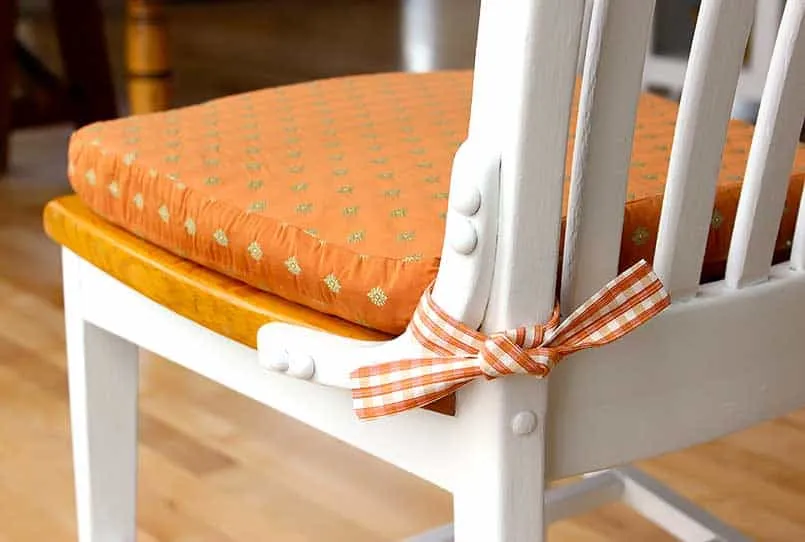
Are you tired of dealing with an uncomfortable and worn-out seat cushion? Replacing it can be a daunting task, but with the right materials and some DIY know-how, you can create your own seat cushion that will make you feel like you’re sitting on clouds. In this article, we’ll take you through the process of making your own seat cushion using the DIY method.
Restoring a Seat: A Necessary Evil
Restoring a seat can be a daunting task, and replacing its cushioning may be necessary. Over time, chairs, like any other piece of furniture, tend to deteriorate, especially on the armrest. The original shape and comfort of the cushion are lost, making it uncomfortable to sit on.
The Essential Supplies
Before we dive into the DIY process, let’s take a look at the essential supplies you’ll need:
- Foam sheet, 10mm thick and matching the shape of the chair
- Synthetic filling material, 30-40mm in length (polyester fiberfill or similar)
- Thicker, 20mm thick, foam backing (optional) for added support
- Polyester fiberfill (the right amount to fill your seat cushion)
- Cotton fabric (for the cover)
- New fabric for the cover (matching the original color and texture)
Understanding Your Chair’s Needs
Before you start working on your seat cushion, it’s essential to understand what might have caused the deterioration. Has your chair been sitting in a damp environment? Has it been exposed to direct sunlight or extreme temperatures? Identifying the cause of the problem will help you choose the right materials and approach for your DIY project.
Finding the Right Materials
One of the challenges of making your own seat cushion is finding the right materials. In the past, cushions were made from horsehair and wool, but these materials are no longer easily available. Fortunately, synthetic filling materials like polyester fiberfill or nylon are widely available at hardware stores, making it easier to replicate a traditional seat cushion.
Why Choose Synthetic Filling Material?
Synthetic filling materials have several advantages over natural materials:
- Durability: Synthetic fibers are more resistant to wear and tear than natural fibers.
- Easy Maintenance: Synthetic fibers can be easily washed and dried, making them perfect for high-traffic areas.
- Long-Lasting: Synthetic fibers last longer than natural fibers, reducing the need for frequent replacements.
Before You Begin
Before you start working on your seat cushion, check if the damage is due to poor support for the cushioning. If so, you may need a new foam sheet to create a solid base. This will ensure that your DIY project is successful and long-lasting.
How to Create Your Own Seat Cushion
Now that we’ve covered the essential supplies and understanding what might have caused the deterioration, let’s move on to the DIY process:
- Cover the foam sheet with a layer of rigid synthetic material, 30-40mm thick.
- Attach a single piece of thicker foam backing (about 20mm) to the synthetic layer.
- Glue the foam backing to the synthetic layer using a strong adhesive like hot glue or epoxy.
- Add layers of polyester fiberfill on top of the foam backing, applying pressure to give the cushion the desired shape and texture.
Tips for Adding Pressure
Adding pressure to your seat cushion is crucial to achieve the right shape and comfort. Here are some tips:
- Use a firm but not too hard material for the synthetic layer.
- Add multiple layers of polyester fiberfill to achieve the desired density.
- Use a mallet or rolling pin to compress the filling material.
Covering Your Cushion
Once you’ve created your seat cushion, it’s time to cover it with a cotton fabric using a sewing machine or needle and thread. The fabric should be tightly stretched over the filling material to compress it and create a smooth surface.
Why Use a Tightly Stretched Fabric?
Using a tightly stretched fabric is crucial for creating a comfortable and durable seat cushion:
- Prevents shifting of filling materials.
- Provides a smooth surface for sitting.
- Reduces wear and tear on the fabric.
Designing Your Cover
When designing your cover, consider the following factors:
- Color: Choose a color that matches the original color of your chair or seat cushion.
- Texture: Select a texture that complements the synthetic layer and provides comfort.
- Pattern: Consider adding a pattern to enhance the aesthetic appeal of your seat cushion.
Common Mistakes
When making your own seat cushion, there are several common mistakes to avoid:
- Using the wrong foam sheet size: Make sure the foam sheet is large enough to fit the seat cushion.
- Not using enough pressure: Ensure that you apply sufficient pressure to compress the filling material evenly.
Conclusion
Creating your own seat cushion using the DIY method is a simple task that requires just a few materials. By following these tips and tricks, you’ll be able to create a comfortable and durable seat cushion that will last for years to come.
FAQs
- What kind of foam sheet should I use?
- Look for a foam sheet that matches the shape of your chair.
- Choose a 10mm thick foam sheet for optimal comfort.
- How do I choose the right synthetic filling material?
- Consider the size and shape of your seat cushion when choosing the filling material.
- Opt for synthetic materials like polyester or nylon for durability and easy maintenance.
- Can I use a different type of fabric?
- Yes, you can use a different type of fabric, but make sure it’s tightly woven to prevent shifting around.
- How do I attach the foam backing to the synthetic layer?
- Use glue or a strong adhesive like hot glue to secure the foam backing.
- Can I add additional layers to my seat cushion?
- Yes, you can add additional layers of polyester fiberfill for extra comfort and support.
By following these tips and tricks, you’ll be able to create your own comfortable and durable seat cushion using the DIY method.


