
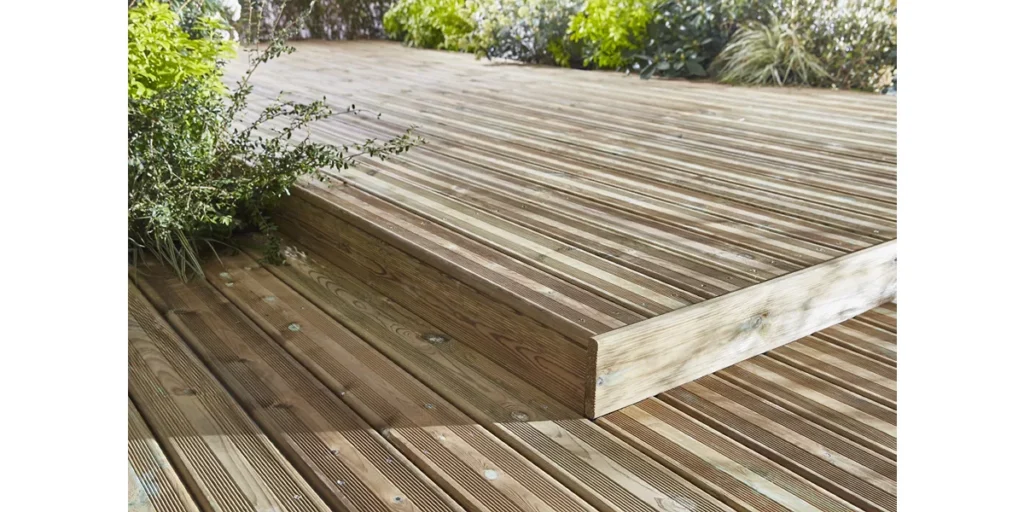
Introduction
Building a wooden deck for your garden can be a rewarding DIY project, but it requires careful planning and execution. In this article, we’ll take you through the process of building a wooden deck for your outdoor space, from choosing the right materials to installing the final product.
Choosing the Right Wood
When it comes to building a wooden deck for your garden, the type of wood you choose is crucial. While reclaimed timber can be an attractive option, it’s not always the best choice. Reclaimed wood from old railway tracks may look appealing, but it often contains toxic substances that can harm the soil and people who come into contact with it.
Instead, opt for sustainably sourced wood that has been properly treated to withstand outdoor conditions. Look for wood that has been:
- Paliated (sanded) to remove any imperfections
- Freshly sanded to prevent splinters
- Levigated (smoothened) to create a smooth surface
- Impregnated with eco-friendly preservatives
Types of Decking Materials
There are several types of decking materials available, each with its own unique characteristics and benefits. Some popular options include:
- Pressure-Treated Wood: A classic choice for outdoor projects, pressure-treated wood is resistant to rot and insect damage.
- Cedar: Western red cedar is a durable, aromatic wood that’s naturally resistant to rot and insects.
- Redwood: Similar to cedar, redwood is a long-lasting, low-maintenance option for your deck.
Decking Materials vs. Imitations
While decking materials can be expensive, there are also affordable alternatives available. Decking materials made from composite materials like plastic and wood fibers can mimic the look of real wood at a fraction of the cost.
However, these imitations may not offer the same level of durability or resistance to outdoor conditions as real wood. Always research the product before making a purchase to ensure it meets your needs.
Preparing the Site
Before building your deck, you’ll need to prepare the site. This involves:
- Assembling a flat surface: Remove any existing lawn and compact the soil to create a level surface.
- Installing supports: Use posts or footings to support the weight of the deck.
It’s also essential to consider the following factors when preparing the site:
- Check for any underground utilities, such as electric cables or water pipes.
- Ensure that the ground is stable and can support the weight of your deck.
- Consider installing drainage systems, such as French drains, to prevent water accumulation around the deck.
The Decking Installation Process
Step 1: Lay Down the Base
Lay down a layer of compacted gravel or sand to provide drainage and prevent settling. This will also help to level out any uneven areas on the ground.
- Use a rake to spread the gravel or sand evenly.
- Compact the material using a hand tamper, plate compactor, or a lawn roller.
- Check that the base is level and even before proceeding with the installation of posts.
Step 2: Install the Posts
Install the posts that will support your deck, making sure they’re level and securely fastened. You’ll need to:
- Dig holes for the posts that are slightly deeper than the post itself.
- Fill the holes with compacted gravel or sand.
- Set the post in place and secure it with concrete or anchor bolts.
Consider using pressure-treated posts or those made from sustainable materials, such as cedar or redwood. Always follow local building codes and regulations when installing posts.
Step 3: Add Decking Boards
Begin installing decking boards, starting from the outside edge and working your way inwards. Use screws or nails to secure each board in place. Consider using:
- Screw-and-plug systems for added security and speed.
- Nailers with a countersinking feature for hidden fasteners.
When installing decking boards, ensure that they’re aligned properly and spaced evenly apart to prevent gaps or uneven wear.
Step 4: Finish with a Cap Board
Finish off the top of the deck with a cap board, which provides additional protection against the elements. Consider using:
- A pressure-treated cap board for added durability.
- A composite cap board that combines wood fibers and plastic materials for improved performance.
A well-designed cap board can also help to prevent water accumulation around the edges of the deck, reducing the risk of rot and damage.
Conclusion
Building a wooden deck for your garden can be a rewarding DIY project that adds value and functionality to your outdoor space. By choosing the right materials, preparing the site, and following the installation process, you’ll be enjoying your new deck in no time.
Tips and Tricks
- Always follow local building codes and regulations when installing a deck.
- Consider hiring a professional contractor if you’re not experienced with DIY projects or if your deck is large or complex.
- Keep in mind that wooden decks require regular maintenance to prevent damage and ensure longevity.
- Use weather-resistant materials, such as sealants and wood preservatives, to protect your deck from the elements.
Frequently Asked Questions (FAQs)
- What’s the best type of wood for building a deck?
Sustainably sourced, properly treated wood that’s resistant to rot and insects. - Can I use reclaimed timber for my deck?
While it may look appealing, reclaimed timber from old railway tracks often contains toxic substances that can harm the soil and people who come into contact with it. - How much does a wooden deck cost?
The cost of a wooden deck can vary widely depending on materials, size, and complexity of design. - What’s the process for building a wooden deck?
Prepare the site, lay down the base, install posts, add decking boards, and finish with a cap board. - Can I build my own wooden deck without professional help?
Yes, but ensure you have proper skills and knowledge to avoid accidents and ensure structural integrity. - What are some common mistakes when building a wooden deck?
Incorrect installation of decking boards, inadequate drainage, and poor weather resistance are some common mistakes. - How long does it take to build a wooden deck?
The time required for the project can vary depending on its size and complexity. - Can I add electricity or plumbing to my new wooden deck?
Yes, but only after consulting with licensed professionals who specialize in electrical or plumbing work.
Additional Resources
- Check local building codes and regulations before starting your project.
- Consult with a professional contractor or DIY expert if you’re unsure about any aspect of the installation process.
- Research decking materials and products to ensure that they meet your needs and budget.


