
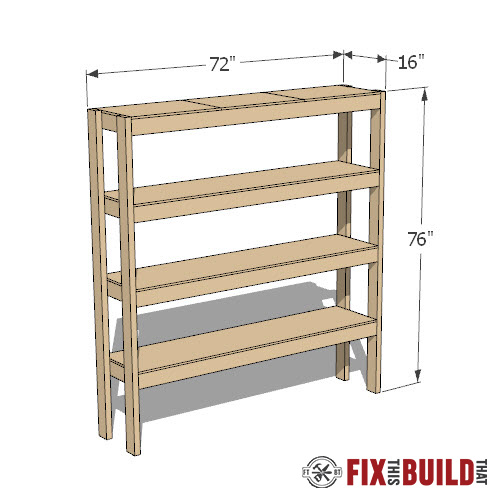
As a homeowner, one of the most important decisions you can make is how to organize your space. With so many options available, it can be overwhelming to choose the right shelving solution. But what if you could create your own shelves from scratch? Not only would you save money, but you’d also have the opportunity to personalize your environment and make it truly unique.
Why Make Your Own Shelves?
So, why should you make your own shelves? Here are just a few reasons:
- Save Money: By making your own shelves, you can avoid paying for expensive store-bought options. Plus, using recycled materials like pallets or wooden boards can be a cost-effective way to create unique and eco-friendly shelving solutions.
- Personalize Your Space: When you make your own shelves, you have the freedom to choose the materials, design, and color scheme that fit your personal style. This means you can create a space that reflects your personality and makes you feel happy and comfortable.
- Get Creative: Making your own shelves is a great way to express your creativity and try new things. Whether you’re a seasoned DIY enthusiast or just starting out, making your own shelves can be a fun and rewarding project.
Making Shelves with a Pallet
One of the easiest and most affordable ways to make shelves is by using pallets. Here’s a step-by-step guide to get you started:
- Gather Materials: You’ll need a pallet, wooden planks, wood glue, saw, metal hooks, cementite, and wood-specific paint.
- Cut the Pallet: Use a saw to cut the pallet into the desired size for your shelf.
- Sand the Surface: Use a levelling tool to smooth out the surface of the pallet, paying attention to the corners.
- Attach Shelves: Cut wooden strips to fit as shelves and attach them using wood glue.
- Apply Cementite: Apply cementite to give your shelf a smooth finish.
- Paint the Shelf: Dip the shelves in paint specifically designed for wood, choosing a color that fits your style.
- Attach Metal Hooks: Use screws for wood to attach metal hooks to the top of the pallet.
- Hang Your Shelf: Hang your newly made shelf on the wall and enjoy!
DIY Shelves with Hidden Supports
If you’re looking for a more modern and sleek shelving solution, consider making DIY shelves with hidden supports. Here’s how:
- Gather Materials: You’ll need supports for shelves, shelf plates with holes for tacks, a drill, screwdriver, level, key, and rubber mallet.
- Mark the Wall: Mark the points on the wall where you’ll attach your shelf using a level to ensure it’s straight against the wall.
- Drill Holes: Use a drill to make two holes in the wall, using a smaller point first and then the same size as the tacks.
- Insert Tacks: Insert the tacks into the wall and tighten them with a key.
- Attach Shelf Plate: Align the shelf plate with the holes in the wall and push it against the wall using a rubber mallet to make the shelf more stable.
- Attach Hidden Supports: Use an electric saw to secure the hidden support brackets to the wooden board with wood screws.
Shelves Made from Wooden Boards or Planks
If you have wooden boards in your garage that are not being used, consider repurposing them to create rustic shelves. Here’s a step-by-step guide:
- Gather Materials: You’ll need wooden boards, hidden support brackets, flatting (optional), saw, cardboard vellum (wide mesh), electric saw, vices for wood, pencil, and level.
- Cut the Boards: Use a saw to cut the wooden boards into the desired size for your shelves.
- Sand the Surface: Use cardboard vellum to smooth out the surface of the board, paying attention not to miss any point.
- Mark Attachment Points: Mark with a pencil the points where you’ll attach the tacks, supporting the board on a table.
- Flatten the Wood: Apply flatting according to the manufacturer’s instructions.
- Attach Tacks: Attach the tacks to your shelf using an electric saw and wood screws.
- Drill Holes: Define the point where you’ll drill into the wall using a level to ensure it’s straight.
Tips for Making Your Own Shelves
Here are some additional tips to keep in mind when making your own shelves:
- Measure Twice, Cut Once: Before cutting any wood or pallets, double-check that your measurements are accurate. This will help prevent costly mistakes and wasted materials.
- Use Safety Equipment: Always wear safety goggles and a dust mask when working with power tools or sanding wood to protect yourself from injury.
- Sand Smoothly: Use a sander or sandpaper to smooth out any rough edges or surfaces, especially if you’re using pallets or wooden boards.
- Choose the Right Paint: Select paint specifically designed for wood that matches your desired color and style.
Common Mistakes to Avoid When Making Your Own Shelves
Here are some common mistakes to avoid when making your own shelves:
- Incorrect Measurements: Double-check that your measurements are accurate before cutting any materials. This will help prevent costly mistakes and wasted materials.
- Insufficient Support: Make sure your shelves have sufficient support to hold the weight of whatever items you plan to store on them.
- Poor Sanding: Use a sander or sandpaper to smooth out rough edges or surfaces, especially if you’re using pallets or wooden boards.
Conclusion
Making your own shelves is a fun and rewarding DIY project that can save you money, personalize your space, and express your creativity. Whether you choose to make shelves with a pallet or use wooden boards, follow these steps and tips to create unique and functional shelving solutions for your home.
FAQs
- What materials do I need to make shelves with a pallet?
- Pallet
- Wooden planks
- Wood glue
- Saw
- Metal hooks
- Cementite
- Wood-specific paint
- How do I attach shelves to the wall for DIY shelves with hidden supports?
- Mark the points on the wall where you’ll attach your shelf using a level to ensure it’s straight against the wall.
- Drill holes in the wall and insert tacks.
- Tighten the tacks with a key.
- What materials do I need to make shelves from wooden boards or planks?
- Wooden boards
- Hidden support brackets
- Flatting (optional)
- Saw
- Cardboard vellum (wide mesh)
- Electric saw
- Vices for wood
- Pencil
- Level


