
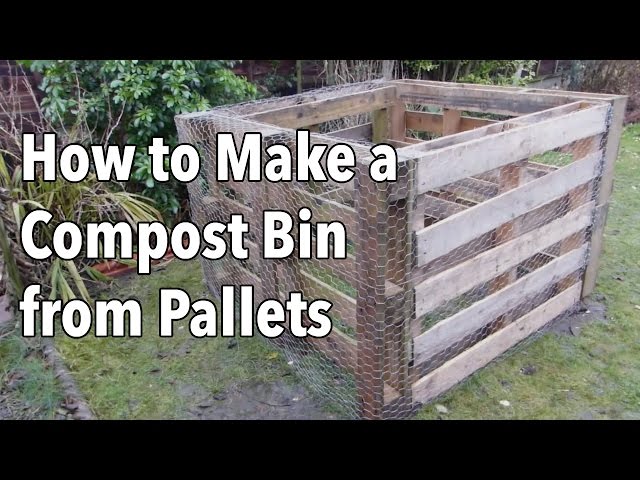
Building a Composter: A Step-by-Step Guide
As we explore the world of composting, it’s essential to understand how to build a composter using a wooden box. This natural form of fertilizer has been around for centuries, and during the composting process, it’s crucial to use an aerated composter, preferably with a lid and bottom.
To construct a composter, we’ll need various tools, including a saw for wood, a screwdriver for securing hinges, a hammer, and a paintbrush for applying a wood finisher to make the wood resistant to environmental factors.
Choosing the Right Materials
For building a garden composter, we’ll require four wooden planks (approximate dimensions 8x8x4 cm), nine wooden boards with a thickness of 2 cm and dimensions 10×82 cm, two upright frames in square section (80×80 mm, height 89 cm) and two upright frames in square section but this time the height will be 77 cm while keeping the same width. These four uprights will form the corners of our composter; we’ll have different heights because the front and back frames need to be slightly shorter.
Additionally, we’ll need:
- Twenty wooden boards cut diagonally with a thickness of 2 cm and length/height 86 cm
- Two wooden planks measuring 10×65 cm
- Twelve wooden spacers (2x2x4 cm)
- Four metal strips (2×2 cm) for the top and two profiles in U shape
- Ten wooden boards with dimensions 10×86 cm, thickness 2 cm
- Two hinges for the lid
- Screws to attach the boards to the uprights
- A wood finisher
The dimensions provided are for building a rather spacious composter. The height of our composter is mainly determined by the uprights.
Step-by-Step Instructions
Here’s how we’ll proceed with constructing our compost container:
- Assemble the base: Attach the four wooden planks together using screws to form the base of your composter.
- Attach the sides: Attach the remaining seven wooden boards to the base, ensuring they’re spaced evenly apart (approximately 2 cm) for proper airflow and preventing liquids from accumulating.
- Secure the frame: Use screws to secure the side panels to the upright frames, making sure they are evenly spaced (about 2 cm).
- Add the front and back panels: Attach the wooden boards to the top and bottom of the composter using hinges for easy access and airflow.
Final Touches
To complete our compost container:
- Secure the lid: Attach a coperchio with two hinges, ensuring proper closure and ventilation.
- Finish the exterior: Apply a wood finisher to protect your composting bin from environmental elements.
Buying a Composter: A More Convenient Option?
If you find building a composter too cumbersome, consider purchasing a pre-assembled model. These compacters are available in various sizes (80-900 liters) and can be purchased at reasonable prices.
When choosing a composter, consider the following factors:
- How much compost do you want to produce?
- What organic waste will you be adding?
For a family of four producing only kitchen scraps, a 300-liter composter should suffice. However, if you also have garden waste, you may need a larger model (400 liters). Alternatively, buying two smaller composters (200 liters each) can make management easier and reduce unpleasant odors.
Using the Composter
Here are some tips for using your composter effectively:
- Start by adding a layer of “brown” materials like leaves or shredded newspaper. This will provide carbon-rich nutrients for decomposition.
- Next, add “green” materials such as kitchen scraps or grass clippings. These provide nitrogen and help speed up the composting process.
- Add water to your composter regularly to keep it moist, but not soaking wet.
- Every week, turn over a portion of your compost pile to ensure even decomposition.
Common Mistakes
When building or using a composter, there are several common mistakes to avoid:
- Not providing enough airflow. This can lead to anaerobic conditions and unpleasant odors.
- Adding too much nitrogen-rich waste. This can slow down the composting process and create unpleasant odors.
- Not maintaining regular moisture levels.
Conclusion
Building your own composter can be rewarding, but it requires some effort and the right tools. If you’re short on time or prefer a hassle-free experience, purchasing a pre-assembled model can be a more convenient option.


