
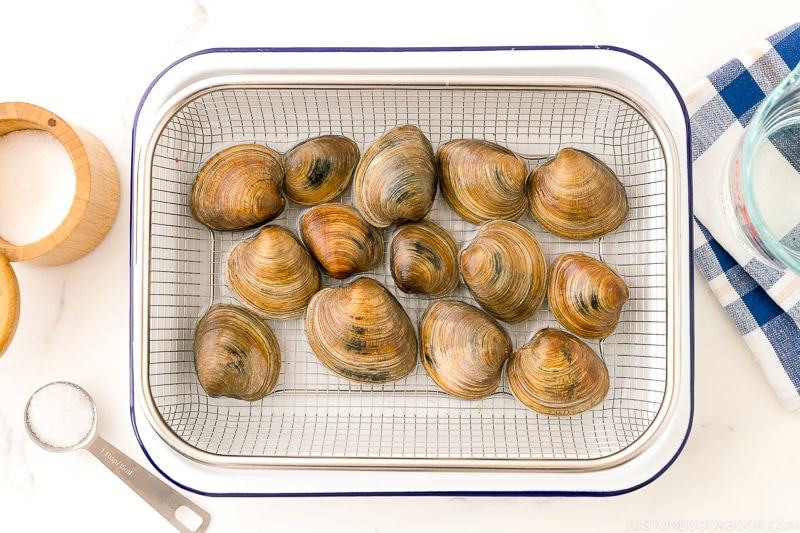
Are you tired of enjoying a delicious sauté de mussels only to discover that they’re still speckled with sand? You’re not alone. Sand can be a major issue when it comes to preparing fresh mussels, and we’re here to help. In this article, we’ll show you how to remove the sand from your mussels using simple, effective methods.
Why is Sand a Problem for Mussels?
Fresh mussels are a delicacy in many cuisines around the world, but they can be tricky to prepare. One of the biggest challenges is removing the sand that accumulates inside the shell. This can lead to an unpleasant texture and flavor, making it difficult to enjoy your dish.
The Importance of Proper Mussel Preparation
To ensure you get the most out of your mussels, proper preparation is key. Removing the sand from your mussels not only enhances their flavor but also helps prevent foodborne illnesses. In this guide, we’ll walk you through the steps to remove the sand from your mussels safely and effectively.
Understanding Mussel Types
Before we dive into the removal process, it’s essential to understand the difference between wild-caught and farmed mussels. Wild-caught mussels tend to have more silt and sediment inside their shells due to their natural habitat. Farmed mussels, on the other hand, are typically cleaner and easier to prepare.
The Removal Process
Removing sand from your mussels requires patience, attention to detail, and a few simple tools. Here’s a step-by-step guide to help you get started:
Step 1: Prepare Your Mussel Bath
To remove the sand from your mussels, you’ll need a large container filled with saltwater. The ideal ratio is 1 cup of salt per gallon of water. You can also use a mixture of salt and sugar to create a sweet-salty brine.
Step 2: Soak Your Mussels
Submerge your mussels in the prepared bath, making sure they’re fully covered. Let them soak for at least 2 hours or overnight. This will help loosen any sand or sediment inside their shells.
Step 3: Rinse and Clean
After soaking, rinse your mussels under cold running water to remove any remaining sand or debris. Use a soft-bristled brush to gently scrub away any stubborn particles.
Step 4: Repeat the Process
Repeat the rinsing process several times until you no longer see any sand or sediment inside the shells. This may take some time and patience, but it’s worth it for a flavorful and enjoyable dish.
Tips and Tricks
Here are a few additional tips to help you remove sand from your mussels:
- Use a clean container: Make sure your bath is clean and free of any contaminants that could end up in your mussels.
- Add acidity: A splash of lemon juice or vinegar can help break down the shell and make it easier to remove the sand.
- Use a strainer: If you’re finding it difficult to rinse out all the sand, try using a fine-mesh strainer to catch any remaining particles.
How to Handle Sand in Different Mussel Types
When handling mussels with different types of shells, keep the following tips in mind:
- Lobster Mussels: These mussels have a hard outer shell that can be difficult to clean. Try soaking them in hot water for 30 minutes before rinsing under cold running water.
- Giant Clams: These large clams have a soft inner shell that can be prone to sand accumulation. Be gentle when cleaning them, and avoid using abrasive scrubbers or harsh chemicals.
Common Mistakes to Avoid
When removing sand from your mussels, there are several common mistakes to watch out for:
- Not soaking long enough: Failing to soak your mussels long enough can result in remaining sand and sediment.
- Using the wrong type of salt: Using regular table salt instead of sea salt or kosher salt can make it harder to remove sand from your mussels.
- Not rinsing thoroughly: Failing to rinse your mussels thoroughly under cold running water can leave behind sand and debris.
Conclusion
Removing sand from your mussels may seem like a daunting task, but with the right techniques and tools, it’s easier than you think. By following these steps and tips, you’ll be enjoying flavorful and enjoyable dishes in no time.
Frequently Asked Questions (FAQs)
Q: Can I use regular salt instead of sea salt?
A: While regular salt can work in a pinch, sea salt is preferred because it has a coarser texture that helps to break down the shell and remove sand more effectively.
Q: How long should I soak my mussels?
A: Soaking your mussels for at least 2 hours or overnight is recommended to ensure they’re fully cleaned and free of any remaining sand or sediment.
Q: Can I use a food processor to clean my mussels?
A: While a food processor can be effective in breaking down shells, it’s not the best tool for cleaning mussels. The risk of damaging the shell or leaving behind small particles is too high.
Q: How do I prevent sand from accumulating on my mussels again?
A: To prevent sand from accumulating on your mussels again, make sure to rinse them thoroughly under cold running water and use a clean container for soaking.
Q: Can I use a pressure cooker to clean my mussels?
A: While a pressure cooker can be effective in breaking down shells, it’s not the best tool for cleaning mussels. The risk of damaging the shell or leaving behind small particles is too high.
Q: How do I store cleaned mussels?
A: Once you’ve cleaned your mussels, store them in a covered container filled with ice to keep them fresh and prevent sand from accumulating again.
Q: Can I use cooked mussels for cooking?
A: While it’s technically possible to use cooked mussels for cooking, it’s not the best idea. Cooked mussels can be too tender and may lose their texture and flavor when reheated. It’s better to clean and cook them fresh for the best results.
Additional Resources
If you’re looking for more information on how to prepare and cook mussels, here are a few additional resources:
- The Mussel Cookbook: This comprehensive cookbook covers everything from basic mussel preparation to advanced cooking techniques.
- Mussel Recipes Online: Websites like Epicurious and Allrecipes offer a wide range of mussel recipes that you can try at home.
By following these simple steps and tips, you’ll be well on your way to enjoying delicious, sand-free mussels in no time. Happy cooking!


