
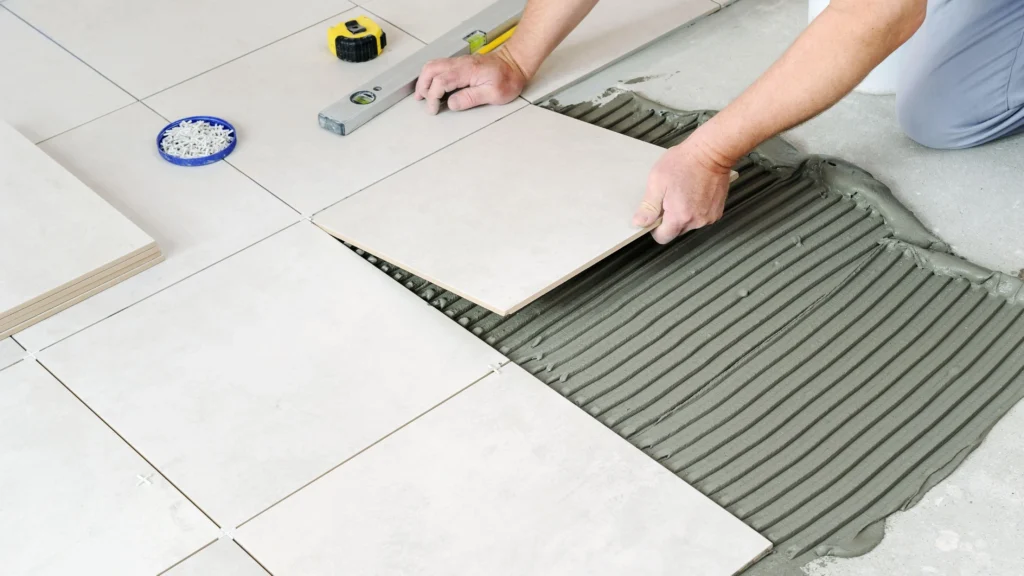
Laying tiles is an art that requires precision, patience, and practice. With the right tools and techniques, you can achieve professional-looking results without breaking the bank. In this comprehensive guide, we’ll walk you through the process of laying tiles for pavimento (floor) and parete (wall), covering everything from preparation to application.
Understanding Tile Types and Forms
Before you begin, it’s essential to understand the different types and forms of tiles available in the market. From classic squares and rectangles to exotic shapes like hexagons, each type offers unique design possibilities. You can mix and match different shapes and sizes to create intricate patterns and designs.
- Ceramic Tiles: Made from clay and other minerals, ceramic tiles are durable and resistant to moisture.
- Porcelain Tiles: A type of ceramic tile that’s even more dense and waterproof.
- Natural Stone Tiles: Includes marble, granite, travertine, and more.
- Glass Tiles: Provides a sleek, modern look with various textures and colors.
Preparation is Key
Before starting the laying process, it’s crucial to prepare the area where you’ll be working. Measure the space accurately, using a precise calculation to ensure that your tiles fit perfectly. Create a detailed plan with the help of graph paper or a digital tool, taking into account the size and shape of the tiles.
Preparing the Substrate
To lay tiles successfully, you need a sturdy substrate (surface) to support them. For irregularly shaped areas, like gardens or outdoor spaces, it’s essential to level and smooth out the surface using an autolivellante product. Alternatively, use a traditional leveling tool for more precise control.
Working with Fresh Cement
If you’re working with freshly laid cement, be patient! Allow at least 30 days for complete drying before applying tiles. Rushing this process can lead to problems down the line.
Using Adhesives and Spacers
To ensure even spacing between tiles, use a combination of adhesives and spacers. Place a small amount of adhesive on each tile and press it firmly into position, using a level to check for evenness. For added precision, use a pair of measuring tapes or calipers to regulate the spacing.
The Laying Process
Starting at the corners, apply adhesive to both tiles and align them carefully with your pre-marked layout. Press down gently but firmly to secure the tile in place. Continue laying tiles, using spacers to maintain even distance between each piece. When finished, use a final check to ensure that every surface is perfectly level.
Cutting Tiles (the Hard Part)
Cutting tiles can be one of the most challenging parts of the process. Invest in a high-quality tile cutter or consider purchasing a more expensive but reliable model. Practice makes perfect! For those new to cutting tiles, it’s recommended to start with smaller pieces and work your way up.
Tips for Working at Height
Working on walls requires additional caution and planning. Use specialized tools like a level and spacers to ensure that every tile is perfectly aligned. Make sure the area is secure before commencing work.
Safety First
Laying tiles can be hazardous if proper precautions aren’t taken. Always wear protective gear, including gloves and safety glasses. Use ladders safely and consider enlisting help when working on tall surfaces.
Getting Started: FAQs
Here are some frequently asked questions that will get you started:
- Q: What is the best way to prepare a surface for tile laying?
A: Measure carefully, use graph paper or digital tools, and apply autolivellante products or traditional leveling tools as needed. - Q: How often should I check the level of my tiles during the laying process?
A: Regularly throughout the project, checking your work at least once per hour to ensure that everything is perfectly aligned and even. - Q: What type of adhesive do I use for tile laying?
A: Use a specialized tile adhesive designed specifically for your tile type. Follow manufacturer instructions for application and drying times.
Conclusion
Laying tiles requires patience, attention to detail, and practice. With the right tools and techniques, you can achieve stunning results that enhance any space. Remember to work safely, use high-quality materials, and take your time – your hard work will pay off in the end!
Additionally, consider consulting with a professional for assistance if you’re unsure about certain aspects of the process or have specific questions about tile laying.


