
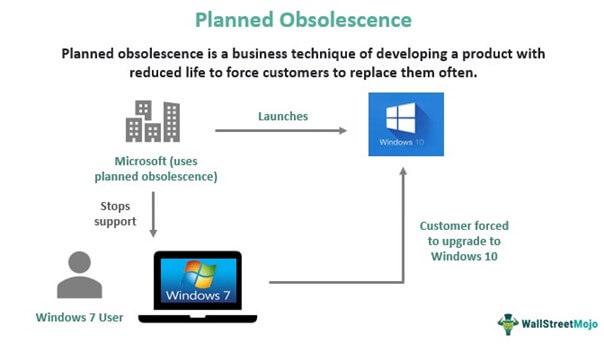
Have you ever wondered why your favorite device or appliance seems to be working its way out of warranty faster than it went in? You’re not alone. The phenomenon of planned obsolescence is a common issue that affects us all, from electronics to appliances.
What is Planned Obsolescence?
Planned obsolescence refers to the intentional design of products to become outdated or obsolete after a certain period. This practice has been around for decades, but it’s gained significant attention in recent years due to its impact on consumer wallets and the environment.
Designing Products with Planned Obsolescence in Mind
One way companies achieve planned obsolescence is by making it difficult or impossible to replace batteries in their products. Designing objects with standardized batteries is a common approach, but it’s not as straightforward as it sounds.
The Benefits of Replacing Batteries
Replacing batteries can significantly extend the life of your devices. With proper care and maintenance, batteries can last for several years. In our case, we’re going to take a 1994 drill that’s been collecting dust in a cabinet for over ten years due to dead batteries.
The Tools You’ll Need
Before starting the replacement process, make sure you have the following tools:
- A medium-sized star-shaped screwdriver
- A flathead screwdriver of similar size
- An electrical tester
- A small soldering iron with tin wire
- Three replacement batteries
- A small container for storing screws
- Thin wire to connect batteries
- White cloth to cover the work surface
Step 1: Measure the Battery Charger’s Function
The first step in replacing your battery is to measure its function using an electrical tester. This ensures that the charger is working correctly and can recharge your batteries.
To do this, plug the charger into a power outlet and check for voltage on the spin tip with two leads. The polarity doesn’t matter; if there’s electricity, proceed.
Step 2: Replace the Battery Charger
If the charger isn’t functioning correctly, you’ll need to use a functional charger from another appliance or purchase an affordable one in store. Be careful when handling the spin tip as different chargers have varying configurations.
When replacing the spin tip on an existing charger, consider the following essential factors:
- Continuity (does it still work?)
- Polarization (positive and negative leads)
- Voltage (tension level)
- Amperage (current flow)
Step 3: Open the Drill
Now that you have a functional charger, open your drill. In our case, there were six screws relatively easy to find, which was fortunate. Be careful not to damage anything when opening the device.
Take a picture of the interior with your smartphone to remember how the components are arranged. This will be helpful later when reassembling the drill.
Step 4: Identify and Remove the Old Battery
Identify the wires leading to the batteries, typically red for positive and black for negative. If they’re different, make a note. Using the soldering iron, remove the wires from the old battery by dissolving them (if they’re stuck using wire strippers). Be careful not to damage any other components.
Step 5: Replace the Battery
The new 1.2V AA rechargeable batteries will increase efficiency while reducing costs. Measure their voltage and amperage, which is roughly double that of original batteries (2.4A).
Now attach the new battery pack to the drill using some wire or thread. Place the new battery in its position within the casing. Make sure they’re not touching each other since they have different dimensions.
Step 6: Reassemble the Drill
Close the drill’s body carefully and ensure all screws are securely tightened without over-tightening them, which can damage the plastic.
One final note: If the capacity is higher than usual, it may take longer to recharge using the original charger. In most cases, a night of charging will allow you to work efficiently for more than an hour.
Conclusion
By following these steps and overcoming planned obsolescence, we can extend the life of our devices and reduce waste. Replacing batteries is a simple yet effective way to do so. With the right tools and knowledge, anyone can defeat planned obsolescence and keep their devices working for years to come.
Frequently Asked Questions
Q: What are some common signs of planned obsolescence?
A: Common signs include design flaws that make it difficult or impossible to repair, the use of outdated materials, and the intentional design of products to become outdated after a certain period.
Q: Can I replace batteries in my device without professional help?
A: Yes, replacing batteries is a simple process that requires basic tools and knowledge. However, if you’re not comfortable with DIY repairs or don’t have experience with electronics, it’s recommended to seek professional help.
Q: How can I reduce waste by replacing batteries instead of buying new devices?
A: Replacing batteries instead of buying new devices reduces waste in several ways:
- Reduces the demand for resources needed to produce new devices.
- Saves energy and water used in the production process.
- Extends the life of your device, reducing the need for frequent replacements.
Q: Can I reuse materials from my old device?
A: Yes, reusing materials like wire, rubber gaskets, and so on whenever possible helps reduce waste. When disposing of old batteries responsibly, we can also “save” pieces of history.
Q: How often should I replace the batteries in my devices?
A: The frequency of battery replacement depends on factors such as usage, quality of the battery, and device design. In general, replacing batteries every 2-5 years is a good rule of thumb.
Q: What are some other ways to reduce planned obsolescence?
A: Some other ways to reduce planned obsolescence include:
- Choosing devices from manufacturers that prioritize repairability and sustainability.
- Repairing or modifying devices instead of replacing them.
- Advocating for extended warranties and product take-back programs.


