
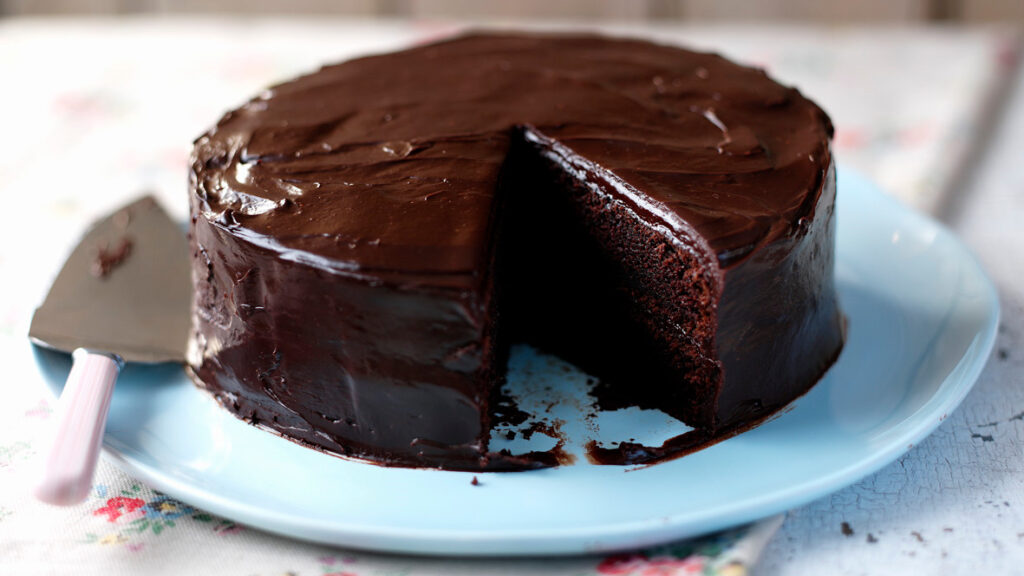
Have you ever sunk your fork into a warm, gooey chocolate tart and felt like you’re in heaven? If so, you’re not alone. The chocolate tart is a beloved dessert that’s easy to make and indulgently delicious.
One of the best things about this sweet treat is its versatility. You can make it from scratch with just a few ingredients, or even prep it ahead of time by freezing it until you’re ready to bake. Yes, you read that right – freezing! Simply pop your tart into the freezer, and then bake it straight from the freezer for an evenly cooked, moist treat.
But don’t worry if you’re short on time; this tart can be made in advance too. Just prep it a few days or even weeks ahead of time, cover it with aluminum foil, and store it in the fridge until you’re ready to bake. You’ll still get that same delicious, chocolatey flavor without all the fuss.
Of course, no discussion of chocolate tarts would be complete without mentioning the type of chocolate used. While milk chocolate or white chocolate can work beautifully, we recommend using high-quality dark chocolate for an intense, rich flavor. And if you’re feeling adventurous, try experimenting with different types of chocolate, like gianduja or hazelnut.
So what are you waiting for? Let’s dive into the world of chocolate tarts and explore the art of making the perfect one!
The History of Chocolate Tarts
Chocolate tarts have been a staple in French patisseries for centuries. The origin of this sweet treat dates back to the 18th century, when French chocolatiers began experimenting with different types of chocolate and pastry dough.
Over time, the chocolate tart evolved into a variety of different shapes and sizes, but its core ingredients remained the same: rich, dark chocolate, flaky pastry crust, and a hint of sweetness. Today, chocolate tarts are enjoyed all over the world, with each country adding its own unique twist to this classic dessert.
The Magic Behind Chocolate Tarts
So what makes a chocolate tart truly special? It’s not just about the ingredients; it’s also about the technique involved in making them.
For starters, you need to have high-quality chocolate that’s rich, dark, and full of flavor. Then there’s the pastry dough, which needs to be flaky, buttery, and just the right consistency.
But here’s the thing: it’s not just about combining these ingredients; it’s also about understanding how they work together. When you combine a rich, chocolatey filling with a crunchy pastry crust, you get a sweet treat that’s both indulgently delicious and visually stunning.
How to Make a Chocolate Tart
Making a chocolate tart from scratch is easier than you think! Here’s our step-by-step guide:
Ingredients
- 30 grams of all-purpose flour
- 30 grams of dark chocolate (at least 70% cocoa)
- 150 grams of high-quality chocolate (such as milk or white)
- 3 large eggs, fresh from the fridge
- 150 grams of unsalted butter, softened
- 100 grams of chopped nuts (optional)
- 1.5 teaspoons of vanilla extract
- 50 grams of granulated sugar
- 1 teaspoon of confectioners’ sugar
Preparation
Step 1: Toasting Nuts
Preheat your oven to 350°F (175°C). Spread the chopped nuts on a baking sheet and toast them in the oven for about 5-7 minutes, or until fragrant and lightly browned. Allow the nuts to cool completely.
Step 2: Grinding Nuts
Grind the cooled nuts into fine crumbs using a food processor or spice grinder.
Step 3: Melting Chocolate
Melt the high-quality chocolate in a double boiler or in the microwave in 30-second increments, stirring between each interval until smooth.
Step 4: Whipping Cream
Whip the softened butter and granulated sugar together in a stand mixer until light and fluffy. Add the eggs one at a time, beating well after each addition. Stir in the melted chocolate, vanilla extract, and ground nuts (if using).
Step 5: Mixing Pastry Dough
Combine the flour and confectioners’ sugar in a separate bowl. Add the cold butter and mix until crumbly. Gradually add ice-cold water to form a dough. Wrap the dough in plastic wrap and refrigerate for at least 30 minutes.
Step 6: Rolling Out Pastry Dough
On a lightly floured surface, roll out the chilled pastry dough to about 1/4 inch thickness. Cut out circles of dough using a cookie cutter or glass.
Assembly
Place one circle of pastry dough into each tart pan, pressing it gently to fit the bottom and sides of the pan. Fill each tart shell with the chocolate mixture, leaving about 1/2 inch at the top for baking.
Step 7: Baking
Bake the tarts in a preheated oven at 190°C (375°F) for about 10-12 minutes or until golden brown. Allow the tarts to cool completely on a wire rack before serving.
Tips and Variations
Here are some tips and variations to help you create the ultimate chocolate tart:
- Use high-quality dark chocolate for an intense flavor.
- Add chopped nuts, dried fruit, or espresso powder to give your tart an extra boost of flavor.
- Experiment with different types of pastry dough, such as puff pastry or phyllo.
- Top your tart with whipped cream, fresh berries, or caramel sauce.
Common Mistakes to Avoid
When making a chocolate tart, there are a few common mistakes that can lead to disappointment. Here are some tips on how to avoid them:
- Don’t overmix the pastry dough, as this can result in a tough crust.
- Make sure to chill the pastry dough long enough before rolling it out, as this will help prevent it from becoming too soft and sticky.
- Use high-quality chocolate for the best flavor.
- Don’t overbake the tarts, as this can cause them to dry out and lose their moisture.
Troubleshooting
We know that even with the best intentions, things don’t always go as planned. Here are some troubleshooting tips to help you fix common problems:
- If your pastry dough is too sticky, try adding a little more flour or chilling it in the fridge for 30 minutes.
- If your chocolate filling is too runny, try refrigerating it for about 30 minutes before assembling the tart.
- If your tarts don’t rise properly, try adjusting the baking time and temperature.
Conclusion
Chocolate tarts are a beloved dessert that’s both indulgently delicious and visually stunning. With just a few simple ingredients and some basic technique, you can create the ultimate chocolate tart from scratch. Whether you’re a seasoned baker or a beginner in the kitchen, this recipe is sure to impress.
So go ahead, give it a try! With practice and patience, you’ll be making perfect chocolate tarts in no time.
Variations and Ideas
Here are some variations and ideas to help you take your chocolate tart game to the next level:
- Try adding different types of nuts, such as almonds or hazelnuts, for added texture and flavor.
- Experiment with different flavors of chocolate, such as mint or orange, for a unique twist on the classic recipe.
- Top your tart with fresh fruit, such as strawberries or raspberries, for a pop of color and sweetness.
- Make individual mini tarts using a cookie cutter to create bite-sized treats.
Getting Creative
Here are some ideas to get you started on creating your own unique chocolate tart creations:
- Try adding a sprinkle of sea salt on top of the tart for added flavor and texture.
- Experiment with different types of pastry dough, such as puff pastry or phyllo, for a flaky and buttery crust.
- Use edible flowers or leaves to garnish your tart for a beautiful and elegant presentation.
- Create a chocolate tart bar by offering different toppings, such as whipped cream, caramel sauce, and chopped nuts.
Frequently Asked Questions
We’ve had some questions from our readers about making chocolate tarts. Here are some answers to help clarify any confusion:
Q: Can I use milk chocolate instead of dark chocolate?
A: While milk chocolate can work beautifully in a tart, it will give a slightly sweeter and milder flavor than dark chocolate.
Q: Can I make individual mini tarts using this recipe?
A: Yes, you can make individual mini tarts using this recipe. Simply divide the pastry dough into smaller pieces and roll them out to fit mini tart pans.
Q: How long do I need to refrigerate the pastry dough before rolling it out?
A: You’ll want to refrigerate the pastry dough for at least 30 minutes before rolling it out, but up to an hour is even better.
Final Tips
Here are some final tips to help you create a perfect chocolate tart:
- Make sure to chill the pastry dough long enough before rolling it out.
- Use high-quality chocolate for the best flavor.
- Don’t overmix the pastry dough or overbake the tarts.
- Experiment with different flavors and toppings to create your own unique creations.
We hope this helps! Happy baking, and don’t forget to share your photos of your delicious chocolate tarts on social media.


