
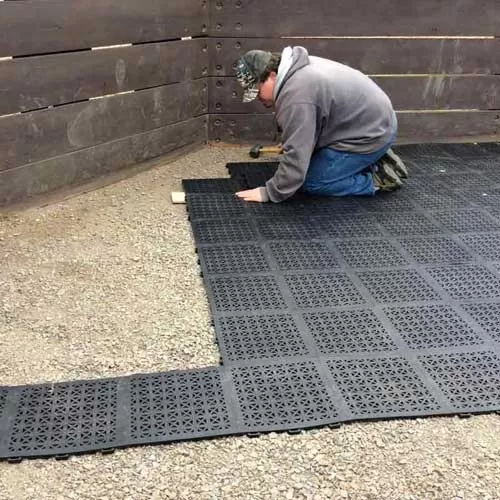
Are you looking to upgrade your outdoor space with a new pavement? Look no further! In this article, we’ll guide you through the process of installing your own outdoor flooring, from preparation to completion. Whether you’re a seasoned DIY enthusiast or a beginner, this comprehensive guide will walk you through every step of the way.
Understanding Your Options
When it comes to choosing an outdoor pavement, there are numerous options available. However, for most homeowners, the choice ultimately boils down to two main types: slab or block paving. Slab paving involves laying flat slabs of material, such as concrete or stone, over a bed of sand and aggregate. Block paving, on the other hand, involves laying interlocking blocks of material, such as concrete or brick, into a pattern.
Preparing for Installation
Before you begin installing your outdoor pavement, there are several steps to take:
- Clear the area: Remove any debris, plants, or obstructions from the designated installation site.
- Level the ground: Use a spirit level and shovel to ensure the ground is even and level.
- Lay down a compacted base layer: A compacted base layer of material, such as gravel or sand, will help prevent settling and ensure a stable foundation for your pavement.
Choosing Your Pavement Material
When it comes to selecting your outdoor pavimento material, there are many factors to consider:
- Durability: Will the material withstand heavy foot traffic, vehicle use, or harsh weather conditions?
- Maintenance: How easy is the material to clean and maintain?
- Aesthetics: What color and texture will complement your existing outdoor space?
Types of Pavimento Materials
There are several types of pavimento materials available, each with its unique characteristics and benefits. Some popular options include:
- Concrete Slabs: A cost-effective option that can be customized to suit your needs.
- Stone Pavers: A durable and low-maintenance option that adds a touch of elegance to any outdoor space.
- Brick Pavers: A versatile option that can be used for both walkways and driveways.
Installing Your Pavimento
Now that you’ve chosen your material and prepared your site, it’s time to start installing:
- Lay down a layer of compacted sand: This will provide a stable base for your pavement.
- Begin laying your slabs or blocks: Use a spirit level and straightedge to ensure proper alignment and spacing.
- Compact the material as you go: Use a plate compactor or hand tamper to ensure the material is securely in place.
Tips and Tricks
To ensure a successful installation, keep these tips and tricks in mind:
- Use high-quality materials: Invest in materials that are durable and long-lasting.
- Follow manufacturer instructions: Adhere to the recommended installation procedures outlined by your supplier.
- Take your time: Don’t rush the process – proper installation is key to a successful outcome.
Common Mistakes to Avoid
When it comes to installing your outdoor pavement, there are several common mistakes to avoid:
- Inadequate preparation: Failing to properly prepare the site can lead to a subpar installation.
- Insufficient material support: Not providing enough material support can result in settling or shifting of the pavement.
- Poor alignment: Incorrect alignment can affect the overall appearance and functionality of your pavimento.
Maintenance and Upkeep
Once your outdoor pavement is installed, regular maintenance will help extend its lifespan:
- Regularly inspect the pavement: Check for any cracks, unevenness, or other issues that may need attention.
- Clean the pavement regularly: Use a broom and mild detergent to keep the surface clean and free of debris.
- Repair any damage promptly: Address any issues as soon as possible to prevent further damage.
Conclusion
Installing your own outdoor pavimento can be a rewarding DIY project. By following this comprehensive guide, you’ll be well on your way to creating a beautiful and functional outdoor space that will last for years to come.
Frequently Asked Questions
- What is the best material for an outdoor pavement? The best material for an outdoor pavement depends on various factors, including durability, maintenance requirements, and aesthetics. Consider options like concrete, stone, brick, or pavers when selecting a material.
- How do I prepare the site for installation? Before starting the installation process, clear the area of debris, plants, and obstructions. Level the ground using a spirit level and shovel. Lay down a compacted base layer to ensure a stable foundation.
-
What are some common mistakes to avoid during installation? Common mistakes include inadequate preparation, insufficient material support, and poor alignment. To avoid these issues, follow manufacturer instructions and take your time during the installation process.
-
How often should I clean my outdoor pavement? Regular cleaning is essential for maintaining a durable and attractive pavement. Sweep or broom the surface regularly to remove debris and dirt.
- What is the best way to repair cracks in my pavimento? Repairing cracks promptly will prevent further damage. Use a patching compound specifically designed for your material type and follow manufacturer instructions.
-
Can I install an outdoor pavement myself, or should I hire a professional? If you’re comfortable with DIY projects and have the necessary skills and experience, installing an outdoor pavimento can be done on your own. However, if you’re unsure about any aspect of the process, consider hiring a qualified professional.
-
What is the average lifespan of an outdoor pavement? The lifespan of an outdoor pavement depends on various factors, including material quality, installation techniques, and maintenance practices. With proper care, a well-installed pavimento can last for 20 to 30 years or more.
- How do I choose the right color and texture for my outdoor pavement? Consider your desired aesthetic, climate, and functional requirements when selecting a color and texture. You may also want to consult with a design professional or manufacturer representative for guidance.
- Can I use different materials for different areas of my yard? Yes, you can use various materials for distinct sections of your yard, such as contrasting stone or brick for pathways versus a single material like concrete pavers for the main area.


