
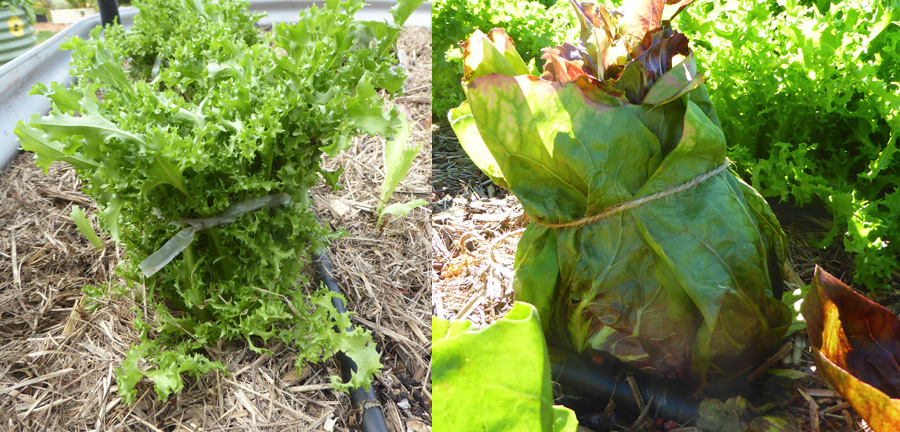
As the seasons change, our attention turns to the world of winter vegetables. Among the most prized is the radicchio, a leafy green with a rich history and a plethora of varieties. But what sets it apart from other greens? The answer lies in the art of blanching, a technique that transforms its bitter flavors into something sweet and tender.
What is Blanching? And Why Does It Matter?
Blanching is a simple yet effective method for improving the quality of certain vegetables, including radicchio. By subjecting it to a controlled environment with reduced sunlight, we can coax out its natural sweetness and enhance its texture. This process involves exposing the plant to specific conditions, such as temperature and humidity, which triggers a series of biochemical reactions that alter its flavor and consistency.
Radicchio: The King of Winter Vegetables
Radicchio is a member of the chicory family, with over 20 varieties grown worldwide. Each has its unique characteristics, but most share a similar profile: bitter flavors, crunchy texture, and a hint of sweetness. When it comes to blanching, some varieties respond better than others.
Understanding Radicchio Varieties
Different radicchio varieties have distinct differences in terms of flavor, texture, and growth habits. Some popular types include:
- Radicchio Treviso: Known for its delicate leaves with a sweet and slightly bitter taste.
- Radicchio Veronese: Features large, velvety leaves with a stronger flavor profile.
- Radicchio Rosso: Displays bright red leaves with a peppery taste.
Imbianchimento del Radicchio Trevigiano: A Step-by-Step Guide
For those familiar with the trevigiano tardivo (also known as spadone), we’ll delve into its specific needs and requirements for blanching. This variety is prized for its tender leaves, which absorb light and become sweet.
To begin, gather:
- 20-30 radicchio plants
- A container with a drainage system
- Water siphoning from a natural source (or filtered water)
-
Elastics or twine for securing the mounds
-
Collect mature radicchio plants, leaving their roots intact.
- Divide them into smaller clusters and tie together with elastics or twine.
- Place these bundles in a container filled with water, ensuring the roots are submerged but the leaves remain dry.
- Position the containers near a temperature-controlled environment (around 11°C) with filtered light.
The Blanching Process
After 30 days, transfer the radicchio to a low-temperature environment (18-20°C) and a dark location with a fine mesh or spongy substrate (like sand). Keep this humidity level consistent. Let it sit for another 5-6 days before harvesting.
Imbianchimento Facile: A DIY Approach
For those without access to specialized equipment, we can replicate the process using a few simple materials:
- A plastic container
- Water-soaked silt or sand
-
A mesh or sponge-like material for support
-
Prepare your container by filling it with water and adding a layer of silt.
- Place a handful of radicchio roots in the mixture, then add a few more layers until you reach the desired height.
- Cover the top with a mesh or sponge to maintain humidity.
- Keep an eye on your radicchio’s development and aerate it regularly to prevent fungal growth.
Tips for Successful Blanching
To achieve optimal results, consider the following guidelines:
- Maintain consistent temperature and humidity levels throughout the blanching process.
- Provide filtered light to promote healthy growth and sweetness development.
- Handle the radicchio with care to avoid damage or bruising.
- Monitor the plants’ progress regularly to ensure optimal blanching time.
Conclusion
Blanching is an art that requires patience and attention to detail, but the reward is well worth the effort: tender, sweet radicchio ready to be savored in winter salads or as a crunchy accompaniment to meals. Experiment with different varieties and techniques to find your perfect match.


