
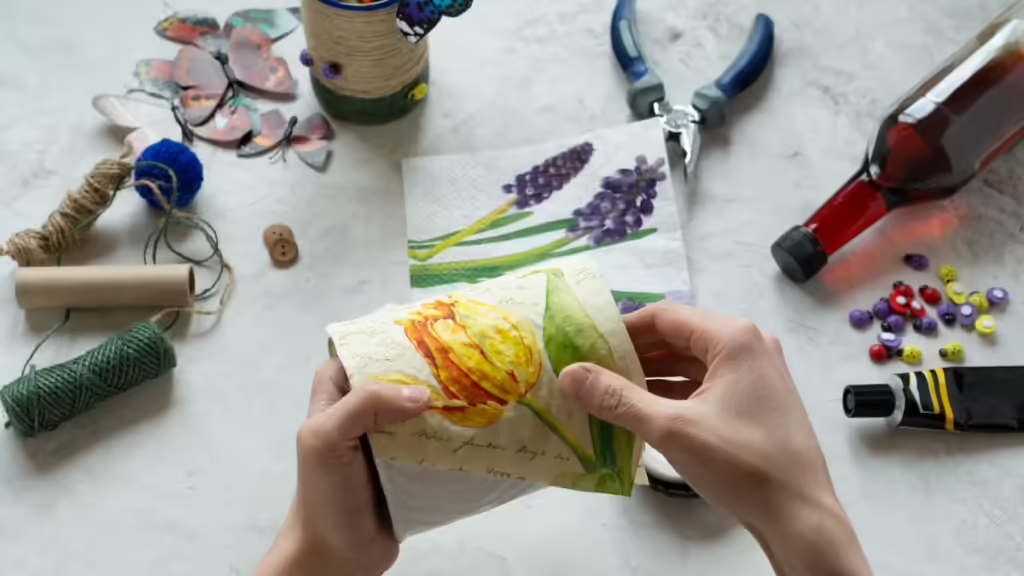
Are you ready to give your old furniture a fresh new look? Look no further than decoupage, a fun and easy way to recycle old wood pieces into unique pieces of art. With just a few simple steps, you can transform a plain wooden chair or table into a one-of-a-kind piece that’s sure to impress.
Why Decoupage on Wood?
Decoupage is an excellent way to give new life to old furniture without breaking the bank. Instead of buying expensive, high-end furniture with a rustic look, you can use decoupage to create a similar effect at home. Plus, it’s a great way to get creative and express yourself through art.
What You Need to Know
Before we dive into the nitty-gritty of decoupage on wood, let’s cover some basics:
- Decoupage is a process that involves applying cut-out images or paper to a surface using glue or adhesive.
- Wood is a porous material, which means it can absorb liquids and create uneven surfaces. This requires special preparation before applying decoupage.
- The type of wood you’re working with will affect the preparation process and the final result.
Preparing the Wood for Decoupage
Before you start your decoupage project, it’s essential to prepare the wood surface. Here are some steps to follow:
Step 1: Clean and Sand the Wood
Give your wooden piece a good clean with a damp cloth to remove any dirt or debris. Then, use a fine-grit sandpaper to smooth out the surface. This will help create a better bond between the wood and the decoupage material.
Step 2: Fill in Any Imperfections
If you’re working with an older piece of furniture, it may have some imperfections like cracks or holes. Use a filler to fill these gaps, making sure they’re completely dry before moving on.
Step 3: Apply a Primer (Optional)
Depending on the type of wood you’re using and the look you want to achieve, you may need to apply a primer. This helps create an even surface for your decoupage material to adhere to.
Choosing the Right Decoupage Material
When it comes to choosing what to use for decoupage, there are many options available. Here are some popular choices:
- Paper: You can use cut-out images from magazines, newspapers, or create your own designs.
- Tissue paper: This is a great option if you want a more textured look.
- Fabric: Choose from a variety of fabrics like cotton, linen, or silk to add a unique touch to your decoupage.
A Step-by-Step Guide to Decoupage on Wood
Now that you have everything you need, let’s move on to the fun part – applying the decoupage. Here’s a step-by-step guide:
Step 1: Apply a Coat of Glue
Use a brush or sponge to apply a thin coat of glue to the wood surface. Make sure to cover the entire area evenly.
Step 2: Place Your Decoupage Material
Carefully position your cut-out images or paper onto the glue-coated surface. Use a gentle touch to avoid creating air bubbles.
Step 3: Smooth Out Air Bubbles
Use a credit card, spoon, or any other flat tool to smooth out any air bubbles that form during the application process.
Step 4: Apply Additional Coats of Glue and Decoupage Material
Depending on how thick your decoupage material is, you may need to apply multiple coats. Make sure each coat is completely dry before adding more layers.
Step 5: Seal with a Varnish (Optional)
To protect your decoupage from dust and moisture, consider applying a varnish once it’s completely dry.
Tips and Tricks
- Use high-quality materials for the best results.
- Experiment with different textures and colors to create unique effects.
- Don’t be afraid to make mistakes – they can often lead to new ideas and inspiration!
With these simple steps, you’re ready to start your decoupage journey. Remember to have fun, experiment with different techniques, and enjoy the process of creating something truly special.
Frequently Asked Questions
Q: What type of wood is best for decoupage?
A: Any type of wood can be used for decoupage, but some woods like pine or fir work better than others. Hardwoods like oak or maple are also popular choices due to their durability and resistance to warping.
Q: How do I get rid of air bubbles in my decoupage?
A: Use a credit card, spoon, or other flat tool to gently smooth out any air bubbles that form during the application process. You can also try using a hair dryer on a low setting to help flatten out the bubbles.
Q: Can I use fabric for decoupage?
A: Yes! Fabric can add a unique touch to your decoupage project. Choose from a variety of fabrics like cotton, linen, or silk. Make sure to choose a fabric that’s suitable for the amount of wear and tear your piece will receive.
Q: How long does it take for decoupage to dry?
A: The drying time depends on the materials used and environmental conditions. Follow the manufacturer’s instructions for specific drying times. Generally, paper-based decals can dry within 15-30 minutes, while fabric or tissue paper may take longer due to their texture.
Q: Can I use varnish on my decoupage project?
A: Yes! Varnish helps protect your decoupage from dust and moisture, but make sure it’s completely dry before applying a second coat. Some types of varnish can also enhance the appearance of your decoupage, adding a glossy or matte finish depending on the brand.
Common Mistakes to Avoid
- Not preparing the wood surface properly, leading to uneven adhesion and potential failure.
- Using too much glue, causing air bubbles and affecting the overall look of the decoupage.
- Applying decals too thickly, making them difficult to work with and potentially creating a mess.
By avoiding these common mistakes, you can ensure a smooth and successful decoupage experience. Remember to stay patient, have fun, and enjoy the process of transforming old wood into something new and beautiful.
Advanced Decoupage Techniques
Once you’ve mastered the basics of decoupage, it’s time to take your skills to the next level. Here are some advanced techniques to try:
- Multi-layering: Experiment with applying multiple layers of decals or paper to create a textured, dimensional effect.
- Stenciling: Use stencils to add intricate designs and patterns to your decoupage project.
- Collage: Create complex collages by layering different textures and materials onto your wood surface.
These advanced techniques can help you take your decoupage skills to new heights, allowing you to create truly unique and stunning pieces of art.
Conclusion
Decoupage on wood is a fun and rewarding process that can add a personal touch to any piece of furniture. With these simple steps and tips, you’re ready to start your decoupage journey. Remember to have fun, experiment with different techniques, and enjoy the process of creating something truly special.
Whether you’re a seasoned crafter or just starting out, decoupage on wood is an excellent way to express yourself and add some personality to your home decor. So don’t be afraid to get creative, try new things, and see what amazing results you can achieve with this versatile and timeless craft.


