
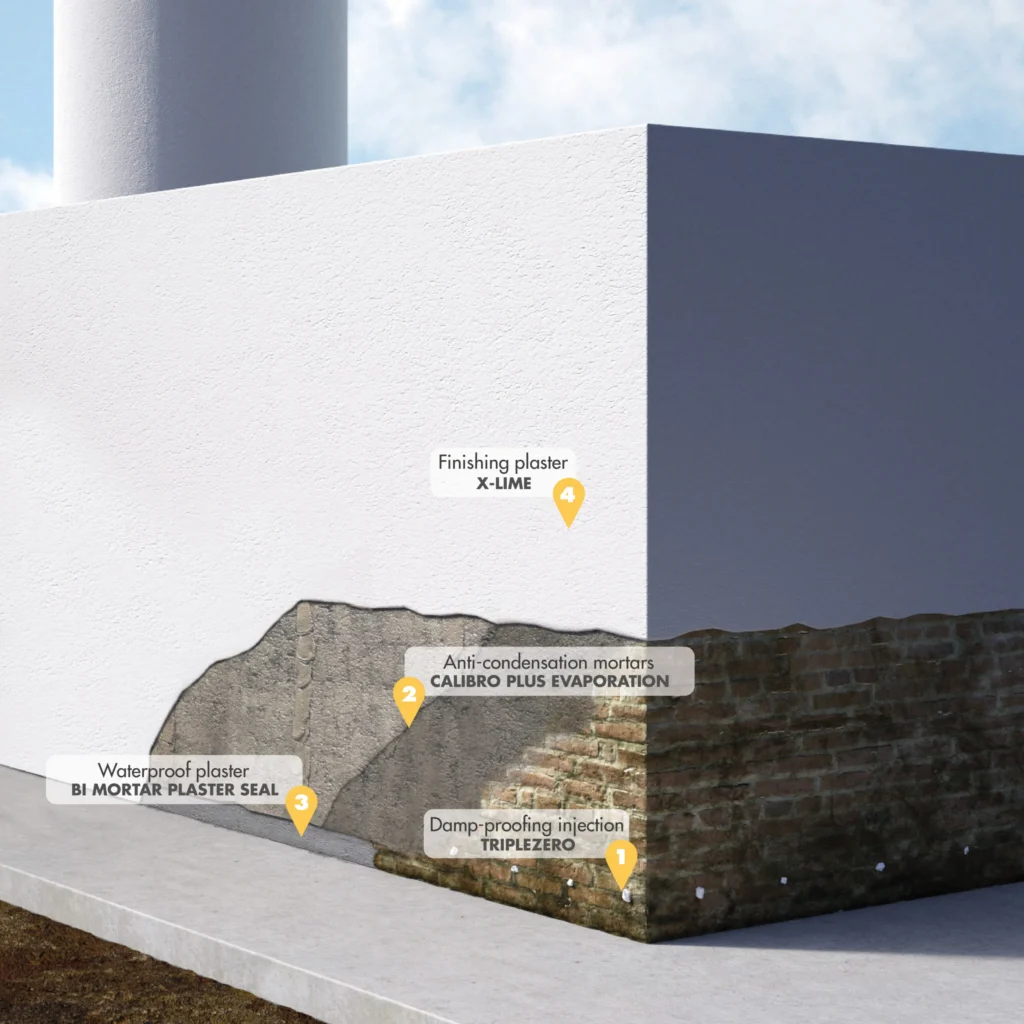
As the seasons change and humidity levels rise, it’s not uncommon for homeowners to experience issues with dampness and mold on their walls. One effective way to combat this problem is by installing a chemical barrier against rising humidity. In this article, we’ll delve into the world of chemical barriers and explore their benefits, applications, and methods of implementation.
What is a Chemical Barrier?
A chemical barrier is a type of coating that is applied to a wall to prevent moisture from penetrating and causing damage. It works by creating an impermeable layer on the surface of the wall, which prevents water vapor from rising into the structure. This can be especially effective in areas prone to high humidity, such as basements or bathrooms.
How Does a Chemical Barrier Work?
A chemical barrier works by diffusing into the capillaries of the wall material, where it polymerizes and forms an impermeable layer. This process is slow and continuous, making it ideal for long-term protection against moisture damage. The resulting barrier is inalterable over time, providing a durable solution to rising humidity problems.
Benefits of Chemical Barriers
There are several benefits to using chemical barriers against rising humidity:
- Effective Solution: Chemical barriers are an effective way to prevent moisture from penetrating walls and causing damage.
- Low Maintenance: The barrier is inalterable over time, requiring minimal maintenance and upkeep.
- Versatile Application: Chemical barriers can be applied to a wide range of wall materials, including stone, brick, concrete, and more.
Methods of Implementation
There are two main methods of implementing chemical barriers: using sacs or bussolotti in gel. Both methods involve drilling small holes into the wall at specific locations and injecting the barrier material through the holes.
- Sacs Method: This method involves using a kit that includes pre-activated formula, containers, and connectors to inject the barrier material into the wall.
- Bussolotti Method: This method uses a gel-like substance that is injected into the wall through small holes drilled at specific locations. The gel then polymerizes over time, forming an impermeable barrier.
DIY Chemical Barrier Kits
There are several DIY chemical barrier kits available on the market that allow homeowners to implement this solution themselves. These kits typically include all the necessary materials and instructions for a successful application.
Some popular DIY kits include:
- Peter Cox Barriera Chimica Fai Da Te: This kit includes pre-activated formula, containers, connectors, and diffusers to create a chemical barrier against rising humidity.
- Bussolotti Gel Barrier Kit: This kit uses a gel-like substance that is injected into the wall through small holes drilled at specific locations.
Additional Solutions
While chemical barriers are an effective solution against rising humidity, they may not be enough to address all issues. In some cases, it may be necessary to combine the barrier with other solutions, such as:
- Dehumidifiers: These devices can help reduce humidity levels in a room or area.
- Coatings and Paints: Applying coatings or paints to the walls can provide additional protection against moisture damage.
Choosing the Right Chemical Barrier Kit
When selecting a DIY chemical barrier kit, there are several factors to consider:
- Size of the wall: Make sure the kit is suitable for the size of your wall. A larger kit may be more expensive and less effective than one specifically designed for smaller walls.
- Type of wall material: Choose a kit that is compatible with your wall material. Some kits may not work effectively on certain types of stone or brick, while others may be specifically designed for concrete or plaster.
- Level of protection needed: Consider the level of protection you need. A lower-end kit may provide sufficient protection against minor dampness issues, while a higher-end kit may offer more comprehensive coverage.
Safety Precautions
When working with chemical barriers, safety precautions are essential to minimize exposure to harmful chemicals:
- Wear protective gear: Use gloves, a mask, and eye protection to prevent skin contact and inhalation of fumes.
- Follow instructions carefully: Read the manufacturer’s instructions thoroughly before starting your project. This will help you understand any specific safety precautions or guidelines for use.
- Work in a well-ventilated area: Make sure the workspace is well-ventilated to prevent inhalation of fumes.
Professional Installation
While some homeowners may feel confident in their ability to install chemical barriers themselves, others may benefit from professional assistance:
- Experience and expertise: Professionals have experience with the installation process and can ensure that the barrier is applied correctly.
- Equipment and materials: Professionals have access to specialized equipment and high-quality materials that are not available to the general public.
- Liability and warranty: When working with a professional, you have the added benefit of liability protection in case anything goes wrong during the installation process. Additionally, many professionals offer warranties on their work.
Frequently Asked Questions
Here are some frequently asked questions about chemical barriers:
- Q: What types of wall materials can be protected with a chemical barrier?
A: Chemical barriers can be applied to a wide range of wall materials, including stone, brick, concrete, and more. - Q: How long does it take for the barrier to polymerize and form an impermeable layer?
A: The time it takes for the barrier to polymerize and form an impermeable layer can vary depending on factors such as temperature, humidity, and wall material. However, it is typically a slow process that occurs over several weeks or months. - Q: Are chemical barriers suitable for all types of humid environments?
A: While chemical barriers are effective against rising humidity, they may not be enough to address all issues. In some cases, it may be necessary to combine the barrier with other solutions, such as dehumidifiers or coatings and paints. - Q: How do I choose the right DIY kit for my project?
A: When choosing a DIY kit, consider factors such as the size of your wall, the type of wall material you have, and the level of protection you need. Be sure to read reviews and follow instructions carefully to ensure a successful application. - Q: Can I apply chemical barriers myself, or do I need professional help?
A: While it is possible to apply chemical barriers yourself, it may be recommended that professionals are called in for larger or more complex projects. This can help ensure accurate installation and optimal results. - Q: Are there any specific safety precautions I should take when working with chemical barriers?
A: Yes, be sure to follow all safety instructions provided with the DIY kit and wear protective gear such as gloves and a mask to minimize exposure to the chemicals involved.


