
Introduction
Installing a radiator in your home can be a daunting task, but with the right guidance, it can be a DIY-friendly project. In this article, we will walk you through the process of mounting a radiator and valves, covering both the installation of new radiators and the replacement of existing ones.
Historical Context
The use of radiators in heating systems dates back to the 19th century. Over time, improvements have been made to their design, leading to more efficient and reliable units. Today, radiators are an essential component of home heating systems, providing warmth and comfort to our living spaces.
Why Replace Radiators?
Radiators can become outdated, inefficient, or damaged over time, requiring replacement. When deciding to replace a radiator, it’s essential to consider factors such as energy efficiency, aesthetics, and functionality.
Choosing the Right Kit
When purchasing a new radiator, it usually comes with the necessary fittings, including valves and pipes. However, if you’re replacing an existing radiator, you may need to purchase additional components, such as valves and raccordi.
Step-by-Step Instructions for Mounting a Radiator and Valves
Step 1: Unpacking and Preparation
Before starting the installation process, ensure you have all the necessary materials, including the new radiator, valves, pipes, and fittings. Follow the manufacturer’s instructions for unpacking and preparing the components.
- Check the packaging for any specific requirements or recommendations.
- Inspect the components for damage or defects.
- Read through the manufacturer’s instructions to understand the installation process.
Step 2: Removing the Old Radiator (if applicable)
If you’re replacing an existing radiator, begin by shutting off the water supply to the heating system and draining the pipes. Use a wrench to remove the old radiator from its mounting bracket, taking care not to damage the surrounding area or the pipes.
- Turn off the heating system at the boiler or valve.
- Drain the pipes using a wrench or pliers.
- Disconnect the electrical connections (if applicable).
- Remove any screws or clips holding the old radiator in place.
Step 3: Preparing the New Radiator
Once the old radiator is removed, inspect the new one for any damage or defects. If necessary, consult the manufacturer’s instructions for specific installation requirements.
- Inspect the new radiator for any damage or defects.
- Read through the manufacturer’s instructions to understand any specific requirements.
- Check if any additional components are required (e.g., valves, pipes).
Step 4: Installing the Valves and Fittings
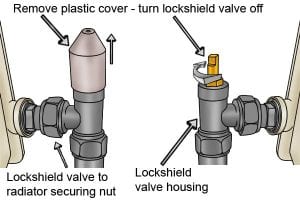
Apply the valves to the new radiator, ensuring they are securely attached using the provided fittings. Use a wrench to tighten the connections, making sure not to over-tighten.
- Apply the valves to the new radiator.
- Connect the pipes to the valves.
- Tighten the connections using a wrench.
- Check for any leaks or issues.
Step 5: Attaching the Radiator to the Wall
Mount the new radiator to the wall using the provided bracket or screws. Ensure it is level and secure, taking care not to damage the surrounding area.
- Mount the radiator to the wall.
- Use screws or brackets to secure it in place.
- Check if the radiator is level and secure.
- Make any necessary adjustments.
Step 6: Connecting the Pipes
Connect the pipes to the radiator, ensuring they are securely attached using the provided fittings. Use a wrench to tighten the connections, making sure not to over-tighten.
- Connect the pipes to the radiator.
- Tighten the connections using a wrench.
- Check for any leaks or issues.
- Make any necessary adjustments.
Step 7: Testing the System
Once all components are installed, turn on the heating system and check for any leaks or issues. Test the valves to ensure they are functioning correctly.
- Turn on the heating system.
- Check for any leaks or issues.
- Test the valves to ensure they are functioning correctly.
- Make any necessary adjustments.
Common Issues and Solutions
- Leaks: Check the connections and fittings for any signs of damage or wear. Tighten any loose connections and replace worn-out components.
- Lack of Heat: Ensure the radiator is properly connected to the heating system and that there are no blockages in the pipes. Check the valves and thermostat settings.
FAQs
Q: What are the benefits of replacing an old radiator?
A: Replacing an old radiator can improve energy efficiency, reduce maintenance costs, and enhance overall comfort.
Q: How do I choose the right kit for my radiator installation?
A: Consider factors such as energy efficiency, aesthetics, and functionality when selecting a kit. Consult the manufacturer’s instructions for specific requirements.
Q: What are some common issues that may arise during radiator installation?
A: Leaks, lack of heat, and improper connections are common issues that may require attention.
Q: Can I install a new radiator without professional assistance?
A: While it’s possible to install a new radiator on your own, consider consulting a professional if you’re unsure about any aspect of the process.
Q: How often should I replace my radiators?
A: Radiators typically last for 10-20 years, depending on usage and maintenance. Regular inspections can help identify potential issues before they become major problems.
Q: What are some tips for maintaining my radiator installation?
A: Regularly check for leaks, clean the radiator, and perform routine maintenance to ensure optimal performance.
Q: Can I install a new radiator in a different location?
A: While it’s possible to relocate a radiator, consult the manufacturer’s instructions and consider factors such as heat loss and energy efficiency before making any changes.


