
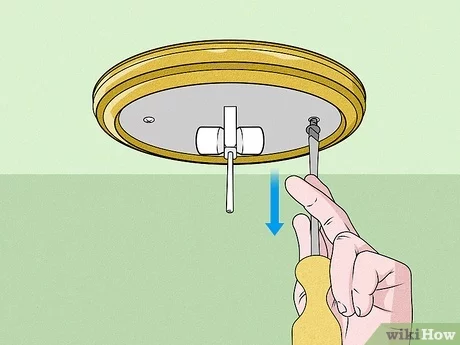
Installing a chandelier can be a daunting task, but with the right guidance, it can be a straightforward process. In this article, we will walk you through the steps of installing a chandelier, including connecting the electrical wires and securing the fixture to the ceiling or wall.
Types of Chandeliers
There are several types of chandeliers available, including:
- Wall-mounted chandeliers
- Ceiling-mounted chandeliers (also known as plafonieres)
- Suspended chandeliers from the ceiling
- Garden lanterns
This guide will cover how to install any type of chandelier that needs to be mounted on a wall and secured to the ceiling or wall.
Safety First
Before starting the installation, make sure to switch off the power to the circuit at the main electrical panel. It’s also a good idea to have someone assist you with the installation.
Tools Needed
In the best-case scenario, you’ll only need a few basic tools:
- Wire stripper
- Needle-nose pliers
- Screwdriver (both flathead and Phillips)
- Drill with bits for making holes in walls or ceilings
- Wall anchors for securing chandeliers to walls or ceilings
Pre-Installation Checks
Before starting the installation, make sure that the electrical wiring is compatible with your new chandelier. Also, ensure that you have the correct voltage and wattage for your lamp.
Installing a Chandelier: A Step-by-Step Guide
1. Prepare the Area
Move any furniture or obstructions away from the area where you’ll be installing the chandelier. Cover the floor with drop cloths or old sheets to protect them from dust and debris.
2. Locate the Electrical Wiring
Identify the electrical wiring in your home, including the circuit breaker box and any wires that connect to the chandelier.
3. Mark the Wall or Ceiling
Use a pencil to mark where you’ll be drilling holes for screws or anchors to secure the chandelier.
4. Drill Holes and Install Anchors
If necessary, drill holes into the wall or ceiling using a drill bit that matches the type of anchor you’re using. Insert the anchors into the holes and screw them into place.
5. Connect the Electrical Wiring
Use wire strippers to strip the insulation from the ends of the wires. Then, use needle-nose pliers to twist the wires together and secure them with wire nuts or electrical tape.
6. Install the Chandelier
Hang the chandelier on the screws or anchors you installed earlier, making sure it’s level and secure.
7. Connect the Power
Turn the power back on at the main electrical panel and test the chandelier to make sure it’s working properly.
Connecting Cables and Wires
To connect cables and wires correctly:
- Connect the black wire (hot) to the brass terminal on the chandelier.
- Connect the white wire (neutral) to the silver terminal on the chandelier.
- Connect the copper wire (ground) to the grounding terminal on the chandelier.
Using a Mammuth
If your chandelier comes with a mammuth, a specialized tool that simplifies connecting wires, use it to connect the electrical wiring. Follow these steps:
- Insert the wires into the mammuth’s corresponding slots.
- Twist the wires together using needle-nose pliers.
- Secure the wires in place with wire nuts or electrical tape.
Troubleshooting Common Issues
If you encounter any issues during installation, here are some common solutions:
- If the chandelier doesn’t turn on, check that all connections are secure and that there’s enough power flowing to the circuit.
- If the light is flickering, check for loose connections or overheating wiring.
Conclusion
Installing a chandelier can be a challenging task, but with the right guidance, it can be completed successfully. By following these steps and using the correct tools and materials, you’ll be able to install your new chandelier in no time.
FAQs
- What type of tools do I need for this project?
- How do I ensure that my electrical wiring is compatible with my new chandelier?
- Can I use a single wire for all connections, or do I need to connect multiple wires together?
- How can I secure the chandelier to the wall or ceiling if it doesn’t come with anchors?
- What are some common issues that may arise during installation, and how can they be resolved?
- Can I use a mammuth for all types of electrical wiring connections?
- How do I ensure that my electrical wiring is safe and secure for daily use?
- Can you provide more information about the different types of chandeliers available?
Additional Tips and Considerations
- Make sure to check the manufacturer’s instructions for specific installation requirements.
- Use a voltage tester to ensure that there’s enough power flowing to the circuit.
- If you’re not comfortable with electrical installations, consider hiring a licensed electrician.
Recommended Tools and Materials
Here are some recommended tools and materials:
- Wire strippers
- Needle-nose pliers
- Screwdriver (both flathead and Phillips)
- Drill with bits for making holes in walls or ceilings
- Wall anchors for securing chandeliers to walls or ceilings
- Mammuth for connecting wires
- Electrical tape or wire nuts for securing connections
By following these tips and guidelines, you’ll be able to install your new chandelier safely and efficiently.


