
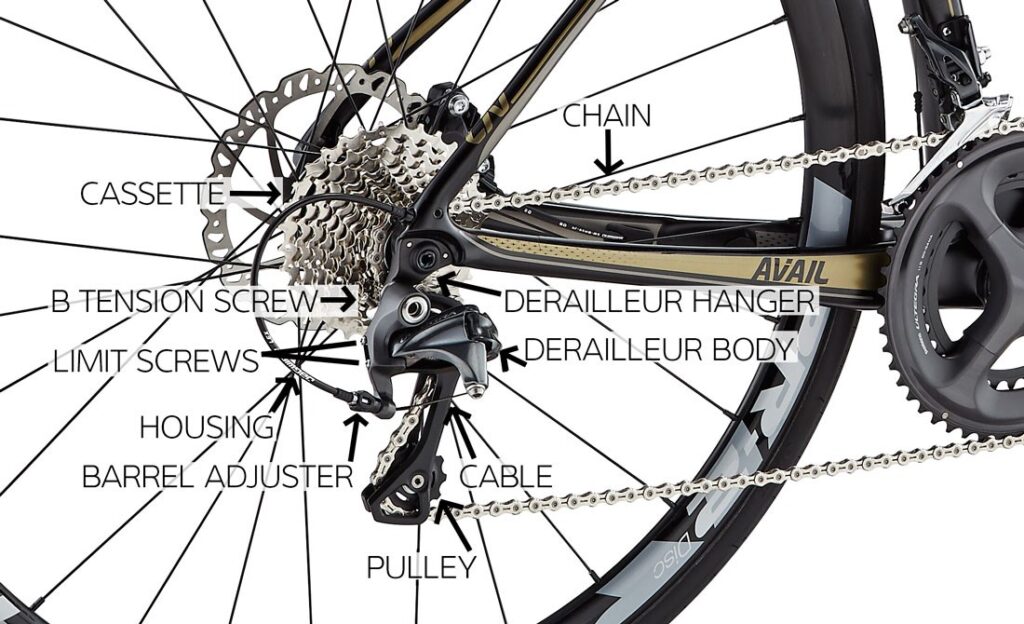
As a seasoned cyclist, you know that properly regulating your mountain bike’s chain is crucial for optimal performance and longevity. But what exactly does it take to get it right? In this comprehensive guide, we’ll walk you through the process of regulating your MTB chain, covering all the essential steps and tips to ensure a smooth ride.
Understanding the Importance of Chain Regulation
Before diving into the nitty-gritty, let’s talk about why chain regulation is so vital. A properly regulated chain ensures that your gears are shifting smoothly, reducing wear and tear on your components, and preventing premature damage. On the other hand, a poorly maintained chain can lead to excessive noise, vibration, and even catastrophic failure.
The Risks of Poor Chain Regulation
If you’re not careful, poor chain regulation can have serious consequences for your bike’s performance and longevity. Some common problems associated with poor chain regulation include:
- Shifting issues: A misaligned chain can cause shifting to be erratic or difficult, leading to frustration and wasted time.
- Chain wear: Excessive tension or slack can lead to premature wear on the chain and other components, reducing its lifespan.
- Cable damage: Over-tightening or under-tightening cables can cause damage to the derailleur, cassette, or other components.
- Noise and vibration: A poorly regulated chain can produce noise and vibration, which can be uncomfortable for riders and affect handling.
Getting Started: Positioning the Chain
To begin the process, you’ll need to position the chain on the smallest cog of your cassette. This is crucial for proper alignment, so take your time to get it right. Once the chain is in place, loosen the tensioner bolt just enough to allow the chain to move freely.
The Key to Smooth Shifting: Regulating the Derailleur
Now it’s time to focus on regulating the derailleur. You’ll want to adjust the limit screws to ensure the chain is properly aligned with the gears. This involves a bit of trial and error, so be patient and don’t be afraid to make adjustments as needed.
- Adjusting the limit screws: The limit screws control the chain’s movement in relation to the cassette teeth. Adjusting these screws requires a delicate touch, as over-tightening can lead to damage.
- Setting the correct derailleur alignment: Properly aligned derailleurs ensure smooth shifting and reduce wear on other components.
Fine-Tuning the Chain: Adjusting the Tension
With the derailleur adjusted, it’s time to fine-tune the chain tension. You’ll want to check the chain length, ensuring it’s properly aligned with the gears. If necessary, adjust the derailleurs and limit screws to achieve optimal tension.
- Checking the chain length: A well-adjusted chain should have a consistent length between the smallest cog on your cassette and the largest cog.
- Ensuring proper alignment: Verify that the chain is properly aligned with each gear on your cassette for smooth shifting.
The Final Touches: Securing the Chain
Once you’ve achieved the perfect balance of tension and alignment, secure the chain with a cable lock or quick link. This will prevent the chain from shifting out of place during use.
- Securing the chain: A well-secured chain reduces wear on components and prevents damage to your bike.
- Using cable locks or quick links: These provide a reliable way to keep your chain in place, even when riding at high speeds.


