
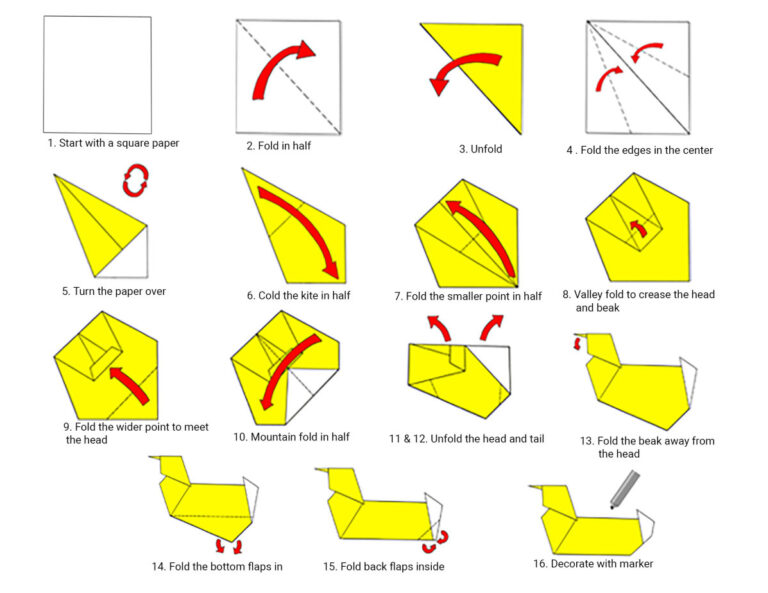
Are you new to the world of paper folding? Don’t worry, this in-depth guide will be your lifeline to avoid getting lost and frustrated before even starting! Origami is indeed a fascinating hobby that teaches you the art of patience and creativity, and it might just capture your heart.
What You Need to Know Before Getting Started
Before diving into paper folding, you’ll need a suitable material. In this section, we’ll explore what kind of paper is best for origami and how to prepare it.
Choosing the Right Paper
When it comes to origami, the type of paper used can make all the difference. You’ll want to use paper that’s lightweight and suitable for folding. While specialized origami paper is available, you can also repurpose common materials like printer paper or newspaper.
In most cases, however, using a sheet of A4-sized paper (8.5 x 11 inches) will work well. To make it suitable for origami, you’ll need to trim the excess paper and create a square shape. This process is explained in detail below.
Preparing Your Paper
To transform your regular A4 paper into a perfect origami sheet, follow these steps:
- Take the top-right corner of the paper and fold it towards the bottom-left corner, creating a 45-degree angle.
- Press the folded edge to create a crease.
- Fold the top edge down along the crease you just made, making sure it’s even with the side of the triangle.
- Repeat step 3 on the other side of the paper.
This will result in two diagonal folds that intersect at the center of the paper. Next, fold the bottom edge up to create a triangle shape.
To make sure your paper is perfectly square, you’ll need to cut off any excess material along the crease. Use scissors or a craft knife to trim the edges, making sure to leave about 1/4 inch of extra material around the fold.
Cutting and Shaping Your Paper
Once you’ve created your square paper, it’s time to shape it into a perfect origami sheet. You can use any tool you like, but a bone folder or a similar blunt instrument will help create sharp creases.
To cut along the folded edge, simply use scissors or a craft knife to trim the excess material. Then, use a ruler or other straightedge to draw a line along the fold, marking where to cut.
Finally, use your cutting tool to carefully trim along the marked line, making sure not to cut too deeply and damage the paper.
And that’s it! You now have a square piece of paper ready for origami. Feel free to experiment with different colors and designs – you can even print out custom templates online or create your own unique designs using markers or paints.
Tips and Variations
If you’re looking for alternative materials, consider the following options:
- Printer paper
- Newspaper
- Cardstock or construction paper
- Colorful cardstock or specialty papers
You can also try using cardstock or specialized origami paper, which is specifically designed to be lightweight and easy to fold. If you don’t have access to these materials, however, a sheet of A4 paper will work just fine.
If you want to add some color to your projects without wasting ink on your printer, consider using colored cardstock, stickers, or other embellishments. You can also try creating your own unique designs by hand using markers, paints, or other art supplies.
Common Origami Paper Folding Techniques
There are several basic techniques that you’ll use when folding paper for origami. Here are a few of the most common ones:
- Valley Fold: A valley fold is made by creating a crease in the paper, then folding it down along that line.
- Mountain Fold: A mountain fold is similar to a valley fold, but you’ll be folding the paper up instead of down.
- Petals Fold: A petals fold involves creating triangular shapes on the paper and then folding them inward.
- Basefold: A basefold is used to create the foundation for many origami designs. It’s a simple technique that involves folding a corner of the paper in toward the center.
Origami Designs for Beginners
If you’re new to origami, it’s best to start with some simple designs that can help you develop your skills and build your confidence. Here are a few beginner-friendly models:
- Paper Plane: A classic origami design, the paper plane is a great way to practice basic folding techniques.
- Origami Box: An origami box is another popular model that’s easy to make and can be used as a storage container or gift box.
- Paper Cup: The paper cup is a simple design that involves creating a series of folds to create a cup shape.
Advanced Origami Designs
Once you’ve mastered some basic techniques, it’s time to move on to more complex designs. Here are a few advanced models:
- Origami Crane: The origami crane is one of the most recognizable origami models and requires some skill and patience to create.
- Origami Boat: An origami boat is another challenging design that involves creating multiple folds to create a sailing vessel shape.
- Origami Dragon: The origami dragon is a more advanced model that requires a lot of folding and creativity.
Troubleshooting Common Origami Issues
When working with paper, things don’t always go as planned. If you encounter any issues while folding, here are a few tips to help you troubleshoot:
- Loose or uneven folds: Make sure your folds are crisp and sharp. If they’re not, try re-folding the paper.
- Misaligned corners: Check that all of your folds are aligned properly and use a ruler or other straightedge if needed.
- Paper tearing: Use scissors or a craft knife to trim the excess material around the fold.
- Paper creasing: Use a bone folder or similar blunt instrument to create sharp creases.
By following these guidelines and tips, you’ll be well on your way to mastering the art of paper folding and creating beautiful origami models that will impress anyone who sees them. Happy folding!
Frequently Asked Questions
- What kind of paper should I use for origami?
- Look for lightweight materials like printer paper, cardstock, or specialty papers.
- How do I prepare my paper for origami?
- Trim excess material from the edges and create a square shape using folds and creases.
- Can I use any type of paper for origami?
- Yes, but lighter materials work best due to their ease of folding.
- What tools do I need to fold paper?
- Basic crafting tools like scissors, bone folders, or craft knives are essential.
-
How long does it take to learn the basics of origami?
- With practice and patience, you can master the fundamentals within a few weeks or months.
-
What kind of designs should I start with?
- Simple models like paper cups, planes, or boxes are great for beginners.
- Can I create intricate designs using origami?
- Yes, with practice and experience, you can move on to more complex models and techniques.
-
Are there any online resources or communities for learning origami?
- Yes, numerous websites, YouTube channels, and social media groups offer tutorials, tips, and inspiration for origami enthusiasts.
-
How do I store my finished origami creations?
- Display them proudly, or consider using storage boxes, folders, or albums to keep them organized.
- Can I make origami with recycled materials?
- Absolutely – repurposing everyday items can add a unique twist to your designs and reduce waste.
By following these guidelines and tips, you’ll be well on your way to mastering the art of paper folding and creating beautiful origami models that will impress anyone who sees them. Happy folding!


