
Building a Planter: A Step-by-Step Guide
Are you looking to add some order and beauty to your garden? Building a planter is the perfect solution. Not only will it help to divide your garden into separate areas, but it can also be a fun and rewarding DIY project.
In this article, we’ll show you how to build a planter using different materials such as stone and concrete or wood. We’ll cover three different methods: building a planter with stones and concrete, building a planter in wood, and creating an intricately carved wooden planter from a tree trunk.
Why Build a Planter?
Building a planter can be a great way to add some personality to your garden while also serving a practical purpose. With a planter, you can divide your garden into separate areas, create a focal point for your outdoor space, and even grow your favorite plants in style.
Materials Needed
To build a planter, you’ll need the following materials:
- Stones or concrete
- Wood (for the frame and bottom)
- Soil and plants
- Sand or gravel for drainage
- Waterproof sealant (optional)
Here’s what you’ll need to get started:
For a Planter with Stones and Concrete
- Stone or concrete blocks
- Sand or gravel for drainage
- Waterproof sealant (optional)
- Trowel and level
For a Wooden Planter
- Wood planks (for the frame and bottom)
- Wood screws
- Hammer
- Measuring tape and square
- Safety glasses and gloves
For an Intricately Carved Wooden Planter from a Tree Trunk
- A tree trunk with a diameter of at least 12 inches
- Measuring tape and square
- Scalpel or saw
- Hammer
- Safety glasses and gloves
- Waterproof sealant (optional)
Step 1: Planning Your Project
Before you start building your planter, it’s essential to plan out your project. Consider the following factors:
- The size of your planter will depend on the space available in your garden.
- Choose a material that suits your needs and budget.
- Think about the style and design of your planter.
Step 2: Building Your Planter with Stones and Concrete
If you’re building a planter with stones and concrete, follow these steps:
- Lay down a layer of sand or gravel for drainage.
- Begin by laying down a foundation of concrete blocks.
- Fill in the gaps between the blocks with compacted soil.
- Continue adding layers of stone and concrete until your planter is the desired height.
- Use a trowel to smooth out the surface of the concrete.
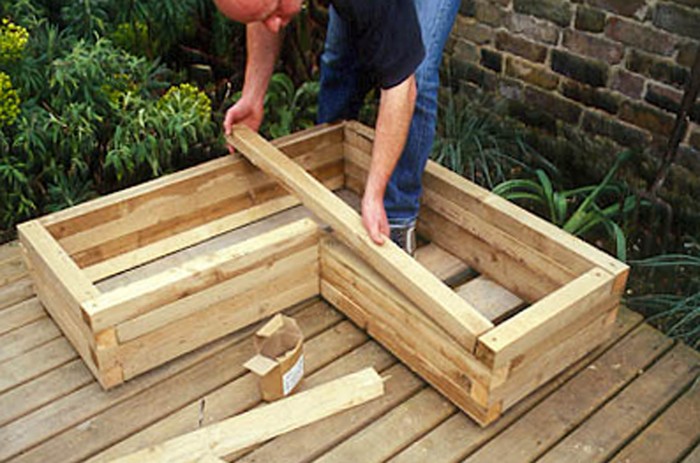
Step 3: Building Your Planter in Wood
If you’re building a planter in wood, follow these steps:
- Measure and cut the wood planks to the required size for your frame and bottom.
- Assemble the frame using wood screws.
- Attach the bottom of the frame to the top plate.
- Use a hammer to tap the joints into place.
Step 4: Creating an Intricately Carved Wooden Planter from a Tree Trunk
If you’re creating an intricately carved wooden planter from a tree trunk, follow these steps:
- Measure and mark out the design on the tree trunk.
- Use a scalpel or saw to carefully carve out the design.
- Sand down any rough edges to smooth out the surface.
- Apply a waterproof sealant to protect the wood.
Step 5: Adding Plants and Soil
Once you’ve completed your planter, it’s time to add plants and soil. Fill the bottom of the planter with sand or gravel for drainage, then add soil and your chosen plants.
Tips and Tricks
Here are a few tips and tricks to keep in mind when building a planter:
- Make sure to choose materials that are weather-resistant.
- Use a waterproof sealant to protect your planter from the elements.
- Consider adding a layer of mulch or gravel around the base of the planter for drainage.
Frequently Asked Questions
Here are some frequently asked questions about building a planter:
Q: How long does it take to build a planter?
A: The time it takes to build a planter will depend on the complexity of your design and the materials you choose.
Q: What kind of plants can I grow in my planter?
A: You can grow a wide variety of plants in your planter, including flowers, herbs, and succulents.
Q: Can I use a pre-made planter kit to build my planter?
A: Yes, you can use a pre-made planter kit to save time and effort.
Additional Tips for Specific Materials
For Stone and Concrete Planters:
- Make sure to use a level when laying the foundation of concrete blocks.
- Use a waterproof sealant to protect your planter from moisture.
For Wooden Planters:
- Choose a type of wood that is resistant to rot and decay.
- Use a waterproof sealant to protect your planter from moisture.
For Tree Trunk Planters:
- Make sure the tree trunk is healthy and free of cracks or rot.
- Apply a waterproof sealant to protect the wood.
Conclusion
Building a planter is a fun and rewarding DIY project that can add personality and style to your garden. By following these steps and tips, you’ll be able to create a beautiful and functional planter that will last for years to come.
We hope this article has provided you with the inspiration and guidance you need to start building your own planter. Happy building!
FAQs
Q: What is the best material to use for a planter?
A: The best material to use for a planter depends on the desired look, durability, and budget.
Q: How do I choose the right size for my planter?
A: Consider the space available in your garden and the type of plants you want to grow when choosing the right size for your planter.
Q: Can I use a pre-made planter kit?
A: Yes, you can use a pre-made planter kit to save time and effort.
Q: How do I add drainage to my planter?
A: Add sand or gravel around the base of the planter to improve drainage.
Q: What kind of plants can I grow in my planter?
A: You can grow a wide variety of plants in your planter, including flowers, herbs, and succulents.


